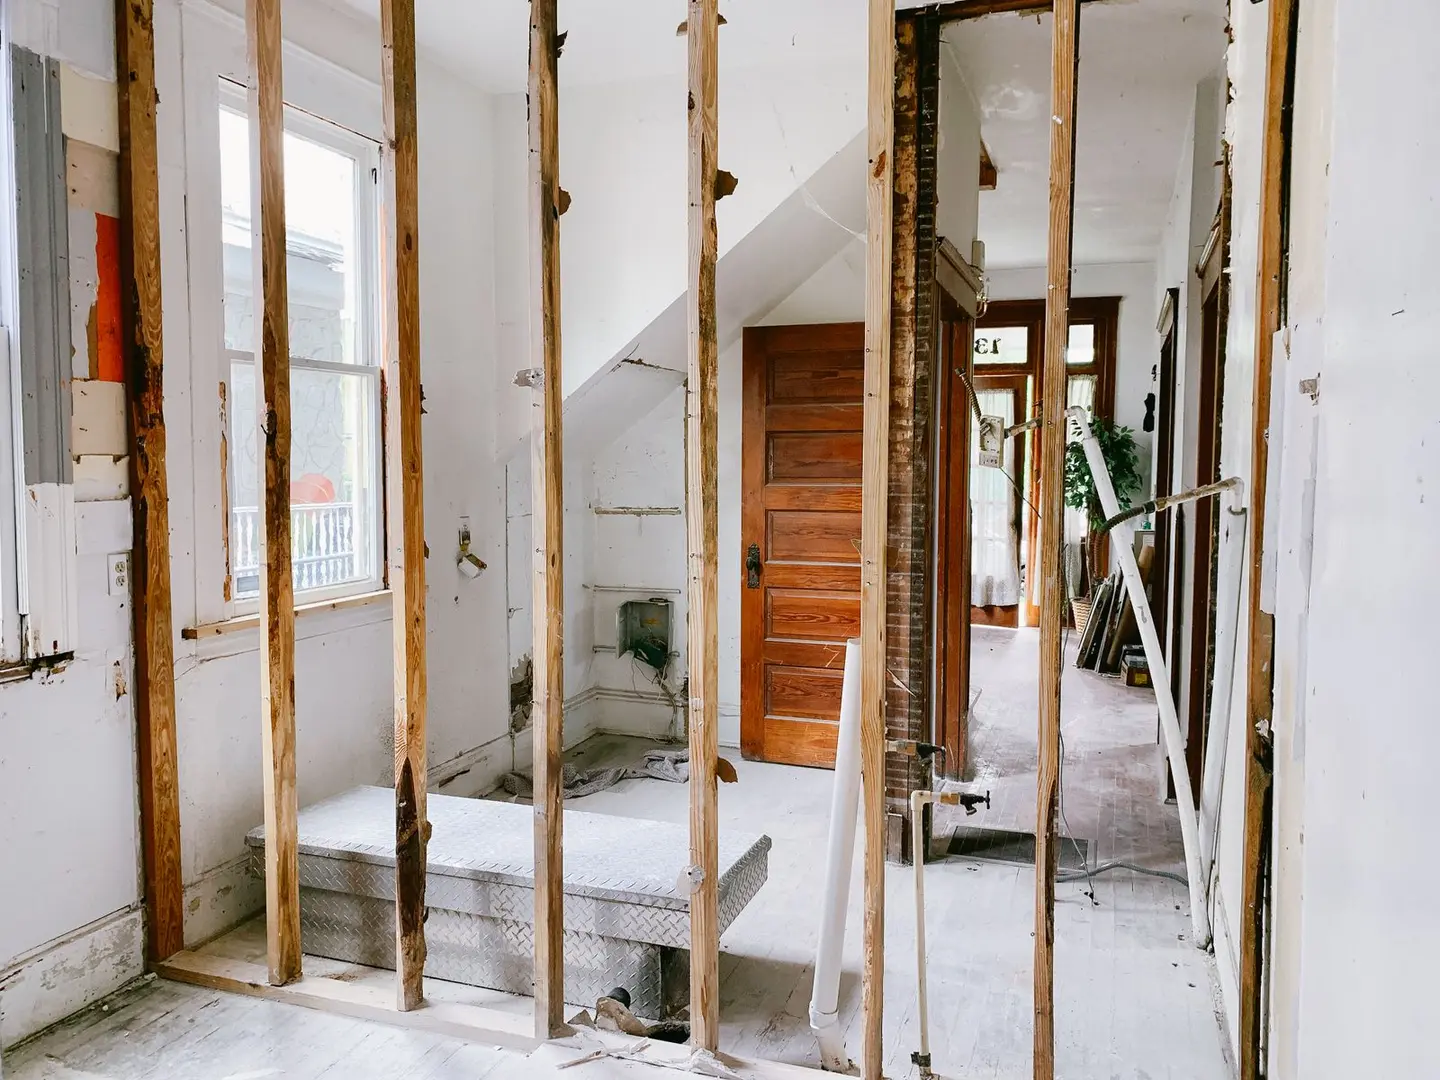
A stud wall, also called a partition wall or stud partition, is the standard way to divide internal space in UK homes. It is a timber or steel frame, clad with plasterboard on both faces, and it can carry standard fixtures such as shelves, picture hooks, and light switches. It does not carry structural loads (it is a non-loadbearing partition), but it can achieve good acoustic and fire performance when correctly specified.
This guide covers a standard domestic timber stud partition from design to boarding, with current material costs and Building Regs requirements where they apply.
Do You Need Planning Permission or Building Regs?
Planning permission: Internal partitions do not require planning permission, provided you are not dividing a dwelling into separate units (which would be a material change of use).
Building Regs: Most internal stud walls in existing homes do not require Building Regs approval. Exceptions include:
- Walls that affect structural stability (e.g., trimming an opening in a loadbearing wall)
- Partitions that form part of a fire compartment (e.g., around a protected escape route or staircase, these need 30-minute fire resistance under Part B)1
- Work that materially affects the fire safety of a building (flats, HMOs, conversions)
- Walls in a habitable conversion (e.g., a loft or garage conversion requires Building Regs for everything)2
If uncertain, check with your LABC before starting.
Tools and Materials
Tools required:
- Tape measure, spirit level, pencil, chalk line
- Circular saw or mitre saw
- SDS drill with masonry bits (for fixing to concrete/block) or cordless drill/driver
- Stud finder or 50 mm nail (to locate existing joists)
- Hammer and pry bar
- Knee pad and safety glasses
Materials for a 3 m × 2.4 m stud wall (about 7.2 m²):
| Item | Specification | Quantity | Approx. unit cost | Total |
|---|---|---|---|---|
| Sole/head plate | 100 mm × 47 mm CLS, treated | 6 m | £2.20/m | £13 |
| Studs | 100 mm × 47 mm CLS, treated | 5 × 2.4 m lengths | £2.40/m | £29 |
| Noggins | 100 mm × 47 mm offcuts | ~4 per bay | From offcuts | - |
| Fixing screws/nails | M6 × 75 mm frame fixings; 3.5 × 75 mm woodscrews | 1 box each | £6–£10 | £12 |
| Plasterboard | 12.5 mm standard, 1.2 × 2.4 m boards | 8 sheets (both sides) | £7–£12 each | £60–£96 |
| Plasterboard screws | 3.5 × 35 mm | 1 box | £4 | £4 |
| Jointing tape and filler | Paper tape + setting compound | 1 roll, 1 bag | £15 | £15 |
| Acoustic or thermal insulation (optional) | 75 mm mineral wool slab | ~7 m² | £4–£6/m² | £28–£42 |
| Total materials | ~£140–£210 |
For a 7.2 m² wall, materials cost approximately £20–£30 per m². Add skim plaster coat (or decorator’s finishing) to get the wall paint-ready: typically £15–£25 per m² labour for a plasterer, or use a jointing/tape-and-fill system if you are finishing to a standard suitable for further decoration rather than a smooth skim.
Step-by-Step: Building the Frame
Step 1: Plan and Mark Out
Decide where the wall runs. Mark the floor plate position in pencil. Use a plumb bob or laser level to transfer the line to the ceiling, this is your head plate position. The floor and head plates must be exactly parallel vertically, or the wall will lean.
Mark the position of any door opening in the sole plate, you will not fix this section. Standard door widths are 686 mm, 762 mm, or 838 mm (fin. width); the frame opening must allow for the door lining plus clearance (typically 30–40 mm wider than the door leaf on each side).
Step 2: Fix the Sole Plate
Cut the sole plate to length. If fixing to a timber floor, screw into joists below (locate joists with a joist detector or 50 mm nail). If fixing to a concrete screed, use 6 mm × 60 mm frame fixings at 600 mm centres. Remove the sole plate section in the door opening after the frame is complete.
Step 3: Fix the Head Plate
Cut and fix the head plate to the ceiling joists above. Use 100 mm × 4.5 mm structural screws at 600 mm centres. If the head plate runs parallel to joists, you may need to add noggings between joists above to create a fixing surface, check joist direction before starting.
Step 4: Erect the End Studs
Fix a vertical end stud to each existing wall at the partition ends. Use a 600 mm spirit level to ensure both are perfectly plumb. For masonry or block walls, use 6 mm × 80 mm frame fixings at 600 mm centres. For existing timber stud walls, screw directly into the studs.
Step 5: Install Intermediate Studs
Mark stud centres on both sole and head plates. For 12.5 mm standard plasterboard, 600 mm centres are standard; for heavier plasterboard or acoustic/fire boards, 400 mm centres give stiffer boards and better fixity.
Cut each intermediate stud 3–5 mm short of the floor-to-ceiling height to allow for irregularities. Fit between plates with 90 mm × 3.4 mm ring-shank nails (skew-nailed at 45°) or frame cramps and screws. The stud must be tight against both plates.
Step 6: Add Noggins
Fit horizontal noggins between studs at mid-height to stiffen the frame and provide fixings for heavy items (radiators, wall-mounted TVs). Use 100 mm × 47 mm offcuts, alternating the position slightly so you can skew-nail from both sides. At 1,200 mm height, noggins also provide the horizontal joint support for plasterboard sheets fixed in a horizontal (landscape) orientation.
Step 7: Install Services
Run cables and plumbing (first-fix) through the frame before boarding. Drill 25 mm holes through studs at mid-depth for cables; maintain a minimum 25 mm from the face of the stud or use HSS steel plates to protect cables from screw penetration.
Step 8: Fit Insulation (Optional but Recommended)
For partitions between heated and unheated spaces (e.g., between a house and an integral garage), insulation is required under Part L.3 For internal partitions, 75 mm mineral wool batts between studs significantly improve airborne sound insulation (typically adding 5–8 dB to the wall’s acoustic performance) and are worth fitting even if not strictly required.
Step 9: Board and Finish
Fix 12.5 mm plasterboard with 3.5 × 35 mm drywall screws at 300 mm centres on studs and 150 mm on the perimeter. Stagger board joints between each face of the wall. Apply joint tape and filler (or arrange a skim plaster coat) before decorating.
Common Mistakes to Avoid
| Mistake | Consequence |
|---|---|
| Not checking the head plate is directly above the sole plate | Wall leans; boards bow |
| Fixing sole plate before checking for underfloor services | Nailing through pipes or cables |
| 600 mm centres with heavy tiles or cabinetry | Insufficient board fixity; sagging or cracking |
| No noggins at board joint height | Vertical board joints unsupported; cracking |
| Forgetting first-fix services before boarding | Boards must be removed to run cables |
| Ignoring fire separation requirements in conversions | Building Regs non-compliance; certificate not issued |
When to Call a Professional
Stud walls are well within the capability of a competent DIYer, but call a professional if: the wall is in a loft conversion or garage conversion (Building Regs compliance must be certified); the new partition connects to a loadbearing wall or affects an existing opening; you need fire compartmentation (Part B) compliance; or the wall runs over an underfloor heating mat (requires thermal bridging calculation).1
References (3)
Figures in this note were checked against the sources below on 14 September 2026. Superscript numbers in the text point to them. Every source the site cites, by topic.
- 1technicalvery strongMinistry of Housing, Communities and Local Government.RN-BUE914Approved Document B Volume 1, fire safety in dwellings, 2019 edition with the 2020, 2022 and 2025 amendments and the forthcoming 2026 and 2029 changes collated in. Covers means of warning and escape, internal fire spread through linings and structure, external fire spread and access for the fire service. This is the document behind escape window sizes, protected stairways, the 4.5 metre rule and the fire doors a loft conversion needs.
- 2technicalvery strongThe National Archives, legislation.RN-ZCMRHVRegulation 3 of the Building Regulations 2010, the meaning of building work. Lists what counts: erecting or extending a building, providing or extending a controlled service or fitting, material alteration, work required by a material change of use, and inserting insulation into a cavity wall. If a job is not on this list it is not building work, so this is the first place to check whether approval is needed at all.
- 3technicalvery strongMinistry of Housing, Communities and Local Government.RN-L0FCJXThe in-force U-value tables a DIY insulation or door note must quote, with the exact numbers. Table 4.2, limiting U-values for new fabric elements in existing dwellings, sets roof 0.15, wall 0.18, floor 0.18, swimming pool basin 0.25, window 1.4 or Window Energy Rating Band B minimum, rooflight 2.2, doors with more than 60 per cent of the internal face glazed 1.4 or Doorset Energy Rating Band C minimum, and other doors 1.4 or Doorset Energy Rating Band B minimum. Table 4.3, for existing elements, gives a roof threshold of 0.35 and an improved value of 0.16, which is the figure a loft insulation note needs: paragraph 4.12 says a retained element whose U-value is higher than the column (a) threshold, for example through a loft or garage conversion, should be upgraded to the column (b) value. Paragraph 4.13 allows a lesser upgrade only where the improved value is not technically or functionally feasible or would not achieve a simple payback of 15 years or less. Paragraph 4.8 requires a replacement element to be no worse than the one it replaces as well as meeting Table 4.2. Paragraph 4.10 gives the heritage exception: where character must be maintained, a centre pane U-value of no more than 1.2 or low-emissivity secondary glazing. Note 9 records that the timber window concession of 1.6 or Band C ended on 14 June 2023. The 2021 edition came into force on 15 June 2022; a 2026 edition exists at https://assets.publishing.service.gov.uk/media/69c122a6cfa346b9d4704a55/ADL1_2026.pdf.
-
Approved Document B, Fire safety, Volume 1: Dwellings, 2019 edition incorporating 2020, 2022 and 2025 amendments, Ministry of Housing, Communities and Local Government, accessed 14 September 2026. assets.publishing.service.gov.uk
-
The Building Regulations 2010, regulation 3: Meaning of building work, The National Archives, accessed 14 September 2026. legislation.gov.uk
-
Approved Document L, Conservation of fuel and power, Volume 1: Dwellings, 2021 edition incorporating 2023 amendments, Ministry of Housing, Communities and Local Government, accessed 14 September 2026. assets.publishing.service.gov.uk