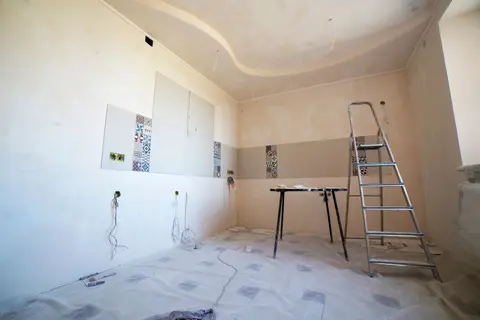
Skimming is the process of applying a thin finishing coat of plaster, typically 2–3 mm total, over a prepared surface to create a smooth, paint-ready finish. It is the last step before decorating on newly dry-lined walls, repaired plasterboard, or existing walls that have become too pitted and uneven to bring back with decorator’s filler alone. It is also the most intimidating DIY plastering task, because the working window is short and technique matters more than in most building trades.
Done badly, skimming leaves ridges, tears and trowel marks that are visible in raking light. Done well, it produces a surface almost indistinguishable from a professional finish. With the right materials and a methodical approach, a competent DIYer can skim an average-sized wall to a good standard, though it usually takes three or four attempts before the process feels natural.
Tools You Need
- 14-inch plastering trowel (stainless steel)
- Hawk (flat aluminium or plastic board for holding plaster)
- Mixing bucket (15–20 litre)
- Paddle mixer (attaches to a power drill)
- Smaller 6-inch skimming trowel or spatula for edges and corners
- Corner trowel (optional but helpful)
- Bucket of clean water and large paintbrush
- Scaffolding board or hop-up for ceiling-height work
Materials and Costs
| Item | Approximate Cost |
|---|---|
| Multi-finish plaster (25 kg bag) | £8–£141 |
| Bonding coat plaster (25 kg bag) | £8–£12 |
| PVA adhesive / diluted bonding agent | £6–£10 per litre |
| Plasterer’s scrims (for joints) | £4–£8 per roll |
| Professional plasterer (day rate) | £150–£250/day2 |
| Professional plasterer (average room skim) | £250–£500 per room |
A 25 kg bag of multi-finish covers approximately 8–12 m² at 2–3 mm depth. For a standard 12 m² bedroom wall, budget on two bags.
Step 1: Prepare the Surface
Skimming over an unsuitable surface is the most common reason for failure. The surface must be:
- Stable, all loose plaster, efflorescence (salt deposits), and peeling paint removed
- Dust-free, brush and vacuum thoroughly
- Not too absorbent, raw plasterboard, bare breeze block and freshly repaired plaster will suck moisture from the skim coat before it can be worked flat
Prime absorbent surfaces with diluted PVA (3:1 water to PVA), allowed to become tacky rather than wet before applying plaster. For plasterboard, use a purpose-made bonding agent or mist coat of diluted PVA (1:5). Stick fibre scrim tape over plasterboard joints and internal corners before skimming.
If there are significant hollows or lumps over 5 mm, apply a bonding coat plaster first and allow it to set (2–4 hours) before the finish coat. Skimming cannot bridge voids, it will craze and crack if applied too thick in a single pass.
Step 2: Mix the Plaster
Pour cold water into the bucket first, about 7–8 litres for a 25 kg bag. Slowly pour in the plaster while mixing with the paddle mixer. The target consistency is thick cream or Greek yoghurt: it should hold its shape on the hawk but flow when the trowel draws through it. Scrape the bucket sides and mix for a full 2 minutes. Do not add more plaster once mixing is complete.
Work in reasonable room temperature, plaster sets faster in warm conditions and more slowly in cold. At 18–20°C, you have around 40–50 minutes working time.
Step 3: Apply the First Coat
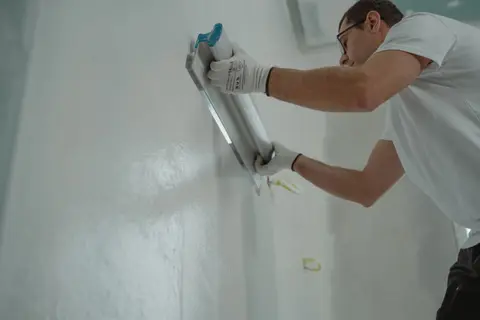
Load the hawk from the bucket and use the plastering trowel to sweep plaster from the hawk to the wall in long, upward strokes. Work a section at a time, typically 1.5–2 m wide, starting from the top and working down. Apply a layer of 1.5–2 mm, spreading firmly to press the plaster into the surface. At this stage, do not worry about perfection: aim for even coverage at a consistent depth.
Press the top edge of the trowel slightly away from the wall (about 5°) on the upstroke and flatten it on the downstroke to reduce ridges. Move quickly, you need the first coat to be on before it starts to firm up.
Step 4: Apply the Second Coat
After 15–25 minutes (the first coat should feel firm but not hard, test with a thumb), apply the second coat at the same 1.5–2 mm depth. This second pass fills any low spots and begins to consolidate the surface. Use longer, smoother sweeps, blending the edges into adjacent sections. At this stage the surface will still look relatively rough.
Step 5: Polish and Feather
This is where the finish is won or lost. As the plaster transitions from firm to hard (you will see the colour change from dark grey to lighter grey), wet the trowel face with the large paintbrush and work it across the surface in wide, flat arcs. The moisture at the trowel face lubricates the setting plaster and drags the cream to the surface, filling pinholes and trowel marks. Apply light, firm, consistent pressure. Work across the entire surface in overlapping passes.
A second polishing pass 10–15 minutes later (using slightly less water) brings the surface to a near-mirror finish. Do not over-trowel: once the plaster starts to drag and tear, stop. It is setting and cannot be reworked.
Step 6: Cure and Dry
Allow the plaster to set hard before doing anything else, typically 24 hours. Fresh plaster shrinks as it loses moisture; keeping rooms warm and ventilated speeds drying but do not force it with a dehumidifier in the first 24 hours. Fully dry plaster is light pink-beige; damp plaster stays darker grey. Wait until the entire surface is uniformly pale before painting.
Apply a mist coat (emulsion diluted 3:1 water to paint) to seal the fresh plaster before any topcoat. Skipping this causes the paint to absorb unevenly and pull away.
Common Mistakes and How to Avoid Them
Mixing too much at once. For a beginner, mix half a bag at a time, you will waste less plaster while you find your pace.
Applying too thick. A 3 mm single coat applied on a cold surface will shrink and crack. Two thin coats are always better.
Trowelling too early. Polishing wet plaster smears it rather than smoothing it. Wait for the colour to lighten slightly before final trowelling.
Skimming over damp walls. Plaster cannot adhere to a saturated substrate. Investigate and fix any damp source before plastering.
Not protecting floors and skirting. Plaster splashes are highly alkaline and can stain stone and timber. Sheet up the floor and tape skirting boards before starting.
If a wall has widespread repairs, a professional plasterer is genuinely better value than fighting a difficult substrate. A day rate of £150–£250 is well-spent for a whole room skim that would take a DIYer a weekend and produce a less predictable finish.
References (2)
Figures in this note were checked against the sources below on 14 September 2026. Superscript numbers in the text point to them. Every source the site cites, by topic.
- 1costsupplier figureWickes.RN-2UJQBOA price, true at 2026-09. Wickes's product page for British Gypsum Thistle Multi Finish plaster in a 25 kg bag, the standard finish plaster for skimming. A published retail price per bag, which with the stated coverage is where a per square metre material cost for skimming comes from.
- 2costvery strongOffice for National Statistics.RN-MMT1DOA price, true at 2025-03. The ASHE Table 14 dataset gives annual estimates of paid hours worked and earnings for UK employees by sex and by full-time or part-time status, broken down to four-digit Standard Occupational Classification, which is the level that isolates individual construction trades such as bricklayers, carpenters, plasterers and electricians. Released 23 October 2025 as the 2025 provisional edition (zip, about 10.7 MB), with revised and provisional editions back to 2017. A correction dated 19 December 2025 suppressed annual pay estimates for SOC 3312 police officers in some areas; construction occupations are unaffected.
-
British Gypsum Thistle Multi Finish Plaster - 25kg, Wickes, accessed 18 September 2026. Priced at 2026-09, so no calibration is needed. wickes.co.uk
-
Annual Survey of Hours and Earnings 2025, Table 14.6a, SOC 5321, Office for National Statistics, accessed 16 September 2026. Priced at 2025-03, so no calibration is needed. ons.gov.uk