Fitting skirting boards is one of the most satisfying finishing jobs in any renovation. Done well, crisp skirtings make a room look sharp and professional. Most DIYers can complete a standard room in a day, provided they take time over the corners, which is where the job either succeeds or fails.
This guide covers everything from choosing your boards to fixing them flush and filling the gaps.
Tools and Materials You’ll Need
Before you start, gather the following:
- Mitre saw (or a good hand mitre box for tight budgets)
- Jigsaw or coping saw
- Tape measure and pencil
- Spirit level
- Multi-tool or oscillating saw (useful for undercutting door frames)
- Grab adhesive (e.g., a solvent-free No More Nails type) and 50 mm lost-head nails or a nail gun
- Caulk gun and decorator’s caulk
- Fine-grit sandpaper (120–180 grit)
- Primer and paint if using bare MDF
Choosing Your Skirting Board
| Material | Typical Cost (per metre) | Best For |
|---|---|---|
| MDF (primed) | £2–£51 | New builds, budget renovations |
| Softwood (pine) | £3–£7 | Period homes, painted finishes |
| Hardwood (oak, tulipwood) | £6–£12 | High-end finishes, stained look |
| PVC / flexible | £4–£8 | Wet areas, awkward curved walls |
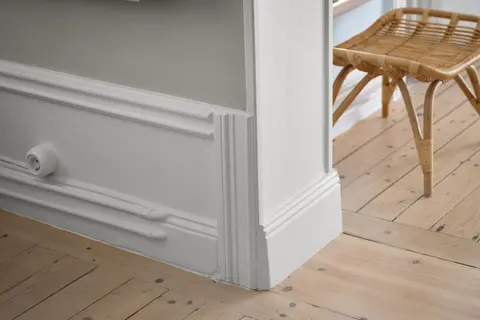
Heights typically range from 70 mm to 220 mm. Older Victorian and Edwardian properties often had 150–220 mm skirtings; modern builds commonly use 95–120 mm. Matching the existing height throughout the room maintains a consistent look.
MDF is the go-to for painted finishes, it takes paint well and won’t shrink or split. Solid timber is worth the premium in period homes or where you want a natural wood finish.
Step 1: Measure and Calculate Your Lengths
Walk the perimeter of the room and measure each wall, including reveals around doors. Add 10–15 % wastage to account for mitre cuts. Sketch a simple floor plan and label each wall length, this prevents costly mistakes when cutting.
Note the position of radiator pipes, electrical sockets close to the floor, and any doorways. You’ll need to notch or cut around these later.
Step 2: Prepare the Wall
Remove any old skirting carefully. A wide bolster chisel and a pry bar do the job without gouging plaster. Fill holes with finishing plaster or fine filler and allow to dry fully.
Check the wall is plumb. Walls in older homes are rarely perfectly straight. If there are significant dips, pack behind the skirting with thin off-cuts of MDF or use extra grab adhesive to fill voids.
Step 3: Cut Internal Corners
The most common mistake is mitring both boards at 45° for an internal corner. This looks sharp on day one but opens up as the wood moves with humidity changes.
The professional method is to cope one of the boards:
- Mitre-cut the first board square into the corner.
- Mitre the second board at 45° to reveal the profile.
- Use a coping saw to follow the profile line, cutting slightly back (5°) so only the front face contacts the first board.
- Test-fit and adjust until the joint is tight.
Coping takes practice but produces joints that stay tight for years.
Step 4: Cut External Corners
External corners (around chimney breasts, bay windows, etc.) are mitred:
- Mark the exact corner point on the face of each board.
- Set the mitre saw to 45° and cut both boards so the face sides meet at the corner.
- Test-fit dry before gluing.
External corners should be pinned through both boards with a 40 mm nail or secured with a corner brace behind, then caulked and sanded flush once painted.
Step 5: Fix the Boards
Adhesive-only fixing works well on flat, solid walls and is quieter and faster. Apply grab adhesive in a zigzag or dab pattern, press the board firmly in place, and wedge temporarily with scrap timber until the adhesive grabs (typically 15–30 minutes depending on the product).
Nailing is recommended on old lime-plaster walls or where the wall is particularly uneven. Use 50 mm lost-head oval nails at 400–600 mm centres, angling them slightly downward into the wall. Punch the nail heads just below the surface with a nail punch and fill.
Combined method, a bead of adhesive plus nails at each stud location, gives the strongest result in new plasterboard walls.
Step 6: Fill, Sand, and Paint
Once all boards are fixed:
- Fill nail holes and any small gaps in joints with fine filler. Allow to dry and sand smooth with 120-grit paper.
- Run a thin bead of decorator’s caulk along the top edge where the skirting meets the wall, and along the bottom if there’s a gap above the floor. Smooth with a wet finger.
- If using bare MDF, apply an oil-based primer before topcoating, MDF is thirsty and will soak up water-based paint unevenly. Two topcoats of satin or gloss in your chosen colour completes the job.
Common Mistakes to Avoid
- Skipping the cope on internal corners, mitres open up; copes stay tight.
- Not priming MDF edges, edges absorb paint and swell unless sealed with solvent-based primer or an MDF primer first.
- Fixing through floor tiles or laminate, always fit skirting after floor coverings so it sits on top and can be removed without damaging the floor.
- Ignoring the floor-to-wall gap, old houses are rarely level. Let the skirting follow the wall, not the floor, and use caulk to close any bottom gap.
When to Call a Joiner
For straightforward rooms with standard walls, skirting is firmly within DIY reach. Call a professional joiner or first-fix carpenter if:
- You’re working with expensive solid hardwood (mistakes are costly).
- The room has very complex geometry, multiple bay windows, curved walls, or underfloor heating sensor locations to work around.
- You need to match ornate Victorian or Edwardian moulding profiles that require specialist routers or run-in custom profiles.
A joiner charges £160–£280 per day in London and the South East; £130–£220 elsewhere in England. A typical four-bedroom house takes one to two days to board throughout.
Cost Summary
| Item | Typical Cost |
|---|---|
| MDF skirting (per metre, primed) | £2–£5 |
| Softwood skirting (per metre) | £3–£7 |
| Grab adhesive (300 ml tube) | £4–£7 |
| Decorator’s caulk (tube) | £2–£4 |
| Joiner day rate (supply & fit) | £130–£2802 |
| Full room (materials only, 12 m perimeter) | £30–£90 |
Take your time on the corners, prime your MDF properly, and caulk the top edge before painting, these three steps separate a professional-looking finish from an amateur one.
References (2)
Figures in this note were checked against the sources below on 14 September 2026. Superscript numbers in the text point to them. Every source the site cites, by topic.
- 1costsupplier figureLawsons (Whetstone) Ltd.RN-86VVKJA price, true at 2026-09. the retail price Lawsons (Whetstone) Ltd publishes for MDF Skirting, which is the supply figure the cost book records for this item
- 2costvery strongOffice for National Statistics.RN-MMT1DOA price, true at 2026-09. The ASHE Table 14 dataset gives annual estimates of paid hours worked and earnings for UK employees by sex and by full-time or part-time status, broken down to four-digit Standard Occupational Classification, which is the level that isolates individual construction trades such as bricklayers, carpenters, plasterers and electricians. Released 23 October 2025 as the 2025 provisional edition (zip, about 10.7 MB), with revised and provisional editions back to 2017. A correction dated 19 December 2025 suppressed annual pay estimates for SOC 3312 police officers in some areas; construction occupations are unaffected.
-
MDF Skirting, Lawsons (Whetstone) Ltd, accessed 15 September 2026. Priced at 2026-09, so no calibration is needed. lawsons.co.uk
-
Earnings and hours worked, occupation by four-digit SOC: ASHE Table 14, Office for National Statistics, accessed 17 September 2026. Priced at 2026-09, so no calibration is needed. ons.gov.uk