Insulating a loft is one of the highest-return home improvements available to UK homeowners. An uninsulated or under-insulated loft loses up to 25% of a home’s heat through the roof, adding mineral wool between and over the joists costs a few hundred pounds in materials but can reduce heating bills by £150–£250 per year in a typical three-bedroom semi. It is also one of the most achievable DIY projects: no specialist skills are required, just good preparation and a willingness to work in a confined space.
Before starting, it is worth confirming which type of loft you have. A cold roof (the most common in UK homes) has the insulation laid at ceiling joist level, with the roof void above remaining cold and ventilated. A warm roof insulates between and under the rafters and is used when the loft space is converted into habitable rooms. This guide focuses on the cold roof approach, the appropriate method for an unused or partially used loft.
Grants and Funding
Check eligibility for the Energy Company Obligation (ECO4) before spending anything; the Great British Insulation Scheme (GBIS) closed on 31 March 2026.1 ECO4 funds free or heavily subsidised insulation for households meeting income or energy-efficiency criteria. Contact your energy supplier or use GOV.UK’s Find ways to save energy in your home service.2 Even if you do not qualify for a full grant, some suppliers offer cash-back on materials.
Tools and Materials
- Mineral wool insulation rolls (100 mm between joists, 170 mm over joists, total 270 mm)
- Rigid insulation board (Celotex, Kingspan or equivalent PIR at 50–100 mm) as an alternative for tight joist depths
- Knee boards (scaffold boards or OSB offcuts, do not walk on ceiling joists)
- Dust mask (FFP3 disposable, or a half mask with a P3 filter). HSE puts construction dust at an assigned protection factor of 20, and an FFP2 only reaches 103
- Safety glasses
- Protective gloves and long sleeves (mineral wool fibres are irritating)
- Head torch
- Craft knife or insulation knife
- Tape measure and straight edge
- Insulation staple gun (optional)
What Depth Do You Need?
270 mm of mineral wool in a cold loft, a 100 mm layer between the joists and a second 170 mm layer laid at 90° across them, is the rule of thumb the trade works to. It is worth knowing it is not what the document says. Building Regulations Approved Document L sets a U-value for the roof and never a depth: 0.16 W/m²K for an existing roof being renovated and 0.15 for a new roof formed in an existing dwelling. 270 mm of ordinary loft roll gets close to 0.16 and nearer 300 mm makes it comfortably. And 0.16 is a limiting value, not the notional dwelling specification: the notional roof in Table 1.1 is 0.11. Older homes may have only 100 mm in situ, topping up is straightforward and qualifies as improvement works.4
| Insulation Configuration | Approximate U-Value |
|---|---|
| 0 mm (no insulation) | ~2.0 W/m²K |
| 100 mm mineral wool (first layer only) | ~0.45 W/m²K |
| 270 mm mineral wool (two layers) | ~0.16 W/m²K |
| 300 mm mineral wool | ~0.13 W/m²K |
| 100 mm PIR board between joists | ~0.20 W/m²K |
Step 1: Assess the Loft and Prepare Access
Visit the loft during daylight to check for: obvious signs of roof leaks or felt damage; exposed or damaged electrical wiring running along joists; water tanks (which need to remain warm, insulate their sides and lids separately, but do not insulate beneath them); and whether the loft hatch has adequate insulation itself (a 100 mm insulated hatch is recommended).
If the loft has existing insulation, measure its depth and note the material. Yellowed loose mineral wool or vermiculite (grey granules) from pre-1980s homes may contain fibrous materials, if in doubt, have a sample tested before disturbing it.
Step 2: Lay the First Layer Between the Joists
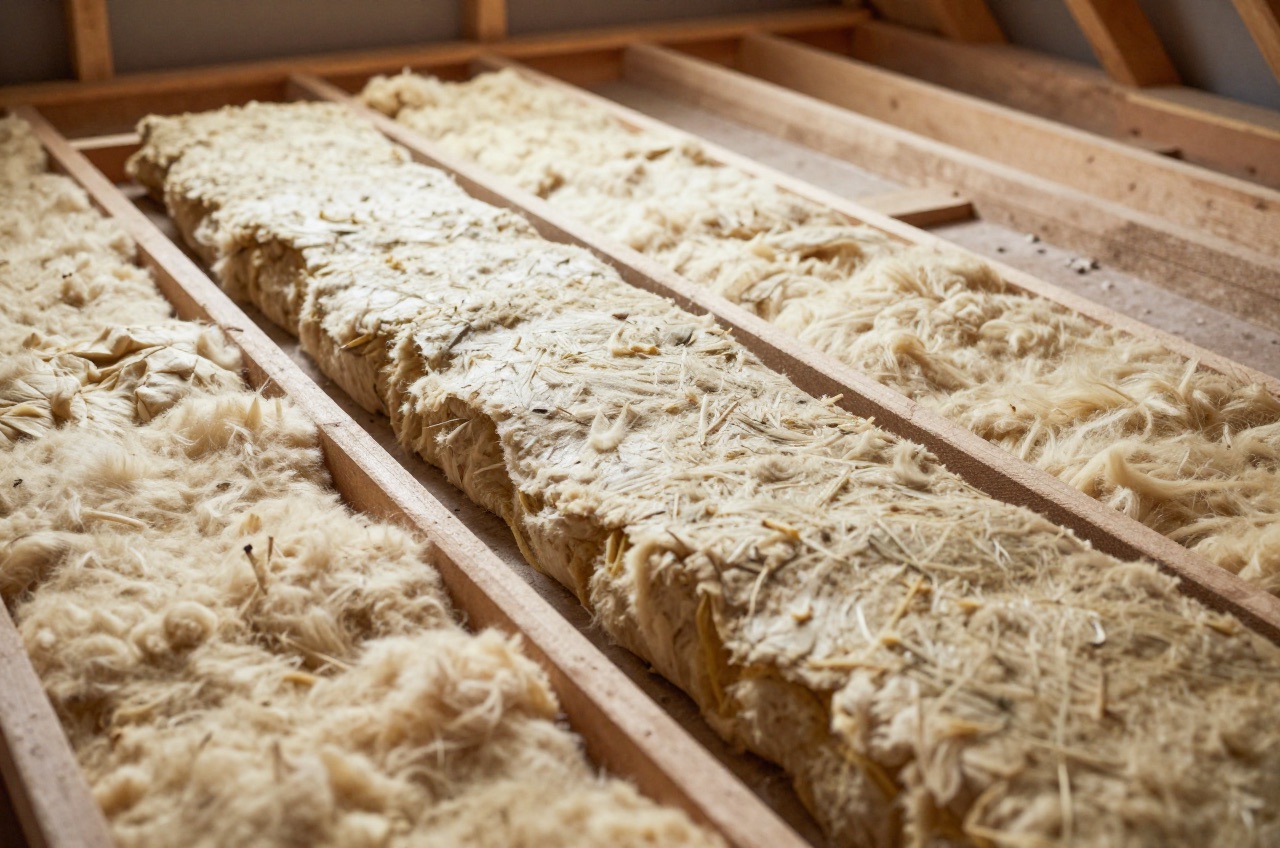
Starting from the eaves and working towards the hatch (so you do not trap yourself), lay rolls of 100 mm mineral wool between the joists. Cut lengths with a bread knife or purpose-made insulation knife, compress the roll slightly, cut, and let it spring back to fill the gap. Push the insulation right to the eaves, but leave a 50 mm clear air gap above the insulation at the eaves for ventilation, blocking this gap causes condensation and roof timber decay.
Fit eaves ventilation baffles (plastic or cardboard chutes) first if they are not already in place.
Step 3: Lay the Second Layer Across the Joists
The second layer (typically 170 mm rolls) runs at 90° to the joists, covering them and the first layer. This eliminates the cold bridge through the timber joists themselves (which have a higher thermal conductivity than the mineral wool). Work from the eaves inward again, butting rolls tightly with no gaps. Where the second layer meets the loft hatch, ensure the hatch is insulated separately, a fitted, draught-proof hatch cover with 100 mm of insulation is available for £30–£60.
Step 4: Insulate the Water Tanks and Pipes
Any cold water storage tanks, expansion vessels, or pipes in the loft must be insulated on their sides and lids, once you insulate the ceiling below, they lose their heat source from the rooms below and are at risk of freezing. Tank jackets cost £15–£30; pipe lagging is £1–£3 per metre. Do not place insulation under tanks, the residual warmth from the floor beneath helps prevent freezing.
Step 5: Seal the Loft Hatch
An uninsulated loft hatch can account for a disproportionate amount of heat loss. Fit a draught-excluding foam strip to the hatch frame and attach a rigid insulation board (50–100 mm PIR) to the top face of the hatch itself. Ready-made insulated hatches with draught seals start from around £40–£80.
Material and Cost Guide
| Item | Approx. Cost |
|---|---|
| Mineral wool (100 mm, 8.28 m² roll) | £10–£18 per roll |
| Mineral wool (170 mm, 5.55 m² roll) | £12–£22 per roll |
| Total materials (average 50 m² loft) | £300–£600 |
| Eaves baffles (pack of 10) | £8–£15 |
| Insulated loft hatch cover | £40–£80 |
| Tank jacket | £15–£30 |
| Professional installation (contractor) | £250–£600 labour |
Common Mistakes
Blocking the eaves. The most damaging error, condensation builds up and rots the roof timbers and felt. Always maintain 50 mm clear air path at the eaves.
Walking on the ceiling. The plasterboard ceiling joists are not designed to take your weight. Use knee boards or crawl boards across at least three joists.
Leaving gaps at the edges. Thermal bridges at the perimeter undermine the whole installation. Pack mineral wool snugly at all edges, cutting to fit rather than folding back.
Forgetting the hatch. A well-insulated loft with an uninsulated hatch is like a well-sealed envelope with a hole in it.
Not insulating the tank. Exposed tanks and pipes in an insulated cold roof will freeze in a hard winter.
Cold loft insulation does not require planning permission. Where the work is part of a larger scheme, the Part L requirement for a renovated thermal element applies, which is a roof U-value of 0.16 W/m²K rather than a stated depth; 270 mm of ordinary loft roll gets close to it and 300 mm clears it. For loft conversions introducing a habitable warm roof, rafter-level insulation with ventilation gaps above the insulation is required, and Building Regulations approval is mandatory.4
The rules in this note are those that apply in England. Scotland, Wales and Northern Ireland have their own building standards and permitted development rights.
References (4)
Figures in this note were checked against the sources below on 14 September 2026. Superscript numbers in the text point to them. Every source the site cites, by topic.
- 1technicalvery strongOfgem.RN-RDOIJRThe scheme, formerly known as ECO+, ran from April 2023 to 31 March 2026 and is now closed. It obliged medium and large energy suppliers to deliver measures reducing energy use in the least energy-efficient homes in Great Britain. Eligibility was homes with an EPC rating of D to G in Council Tax bands A to D in England, or A to E in Scotland and Wales, plus low-income and vulnerable households. Unlike ECO4, which funds whole-house packages, GBIS mostly delivered a single insulation measure per home. This is the page to cite when a note has to say a grant route has closed rather than leave a reader chasing it.
- 2technicalvery strongGOV.UK, guidance.RN-5338K3The government's own recommendation tool, and the neutral link a DIY insulation note should offer instead of a comparison site. It gives personalised home improvement recommendations for property owners in England and Wales, and for each suggestion shows an estimated cost of making the improvement and how much could be saved on bills. It cross-refers to the Boiler Upgrade Scheme, the Warm Home Discount Scheme and the Winter Fuel Payment. A telephone helpline is available Monday to Friday 8am to 6pm except bank holidays, and Saturday 9am to 12pm. The page itself carries no eligibility criteria or scheme figures, so a note quoting grant values must cite the individual scheme pages rather than this one.
- 3technicalvery strongHealth and Safety Executive, guidance.RN-CDLNT7The specific HSE information sheet behind the dust advice, with the numbers a note can quote. Names three types of construction dust: silica dust, also called respirable crystalline silica, from concrete, mortar and sandstone; wood dust from softwood, hardwood and wood-based products including MDF and plywood; and other general dust from materials with little or no silica, most commonly gypsum as in plasterboard, limestone, marble and dolomite. States that over 500 construction workers are believed to die from exposure to silica dust every year, and that the main dust-related diseases are lung cancer, silicosis, chronic obstructive pulmonary disease and asthma, most developing slowly though advanced silicosis and asthma can come on quickly. The legal framework is the Control of Substances Hazardous to Health Regulations 2002, and the three required steps are Assess, Control and Review. On damping down it corrects a common site habit: water needs enough supply at the right levels for the whole time the work is being done, and just wetting the material beforehand does not work. High dust levels come from high-energy tools such as cut-off saws, grinders and grit blasters.
- 4technicalvery strongMinistry of Housing, Communities and Local Government.RN-L0FCJXThe in-force U-value tables a DIY insulation or door note must quote, with the exact numbers. Table 4.2, limiting U-values for new fabric elements in existing dwellings, sets roof 0.15, wall 0.18, floor 0.18, swimming pool basin 0.25, window 1.4 or Window Energy Rating Band B minimum, rooflight 2.2, doors with more than 60 per cent of the internal face glazed 1.4 or Doorset Energy Rating Band C minimum, and other doors 1.4 or Doorset Energy Rating Band B minimum. Table 4.3, for existing elements, gives a roof threshold of 0.35 and an improved value of 0.16, which is the figure a loft insulation note needs: paragraph 4.12 says a retained element whose U-value is higher than the column (a) threshold, for example through a loft or garage conversion, should be upgraded to the column (b) value. Paragraph 4.13 allows a lesser upgrade only where the improved value is not technically or functionally feasible or would not achieve a simple payback of 15 years or less. Paragraph 4.8 requires a replacement element to be no worse than the one it replaces as well as meeting Table 4.2. Paragraph 4.10 gives the heritage exception: where character must be maintained, a centre pane U-value of no more than 1.2 or low-emissivity secondary glazing. Note 9 records that the timber window concession of 1.6 or Band C ended on 14 June 2023. The 2021 edition came into force on 15 June 2022; a 2026 edition exists at https://assets.publishing.service.gov.uk/media/69c122a6cfa346b9d4704a55/ADL1_2026.pdf.
-
Great British Insulation Scheme, Ofgem, accessed 7 September 2026. ofgem.gov.uk
-
Find ways to save energy in your home, GOV.UK, accessed 7 September 2026. gov.uk
-
Construction dust (Construction Information Sheet No 36, Revision 3), Health and Safety Executive, accessed 9 September 2026. hse.gov.uk
-
Approved Document L, Conservation of fuel and power, Volume 1: Dwellings, 2021 edition incorporating 2023 amendments, Ministry of Housing, Communities and Local Government, accessed 14 September 2026. assets.publishing.service.gov.uk