A poorly prepared subfloor is the leading cause of premature flooring failure in UK renovation projects. Tiles crack at grout joints. Laminate develops hollow spots and clicking noises. LVT joins become visible under raking light. Engineered wood creaks. In almost every case, the root cause is a subfloor that was not flat, dry, or stable enough before the covering went down.
Floor levelling compound, also called self-levelling screed or floor smoothing compound, is the main tool for correcting minor unevenness in concrete and timber subfloors. But it is one step in a broader preparation process, not a substitute for understanding and addressing the specific problems your subfloor presents.
Acceptable Tolerances by Floor Covering
Different floor coverings have different tolerance for subfloor variation. The key measurement is deviation under a 2 m straightedge, how much the surface rises and falls over a 2 m span.
| Floor Covering | Max Deviation (2 m straightedge) | Notes |
|---|---|---|
| Large format tiles (>600 mm) | ±3 mm | Back-buttering also required |
| Standard ceramic / porcelain tile | ±3 mm | BS 5385-3 requirement |
| LVT (rigid / click) | ±3 mm | Ridges show in joins |
| Laminate (floating) | ±3 mm | Deflection under load matters too |
| Engineered wood (glue-down) | ±3 mm | |
| Engineered wood (floating) | ±5 mm | Underlay compensates slightly |
| Carpet | ±10 mm | Most forgiving |
These tolerances apply to the finished, primed substrate, not the raw concrete or boards. They come from the tiling and flooring codes of practice rather than the Building Regulations. For ceramic and mosaic floor tiling the relevant part is BS 5385-3, whose current edition is 2024 and which now covers natural stone and terrazzo flooring too, the old Part 5 having been withdrawn in May 2024.1
Diagnosing Your Subfloor
Before buying any product, assess exactly what you are dealing with.
Concrete Subfloor
Age and condition: Pre-1980 concrete ground floors often have no damp-proof membrane. Modern builds and extensions should have a polythene DPM under the slab, at least 300 microns (1200 gauge) with sealed joints, laid on a bed that will not damage the sheet.2 Without it, vapour transmission can be significant.
Moisture testing: The code of practice here is BS 8203, current in its 2017 edition.3 The limit the flooring trade works to is a surface relative humidity below 75% before an impermeable covering goes down. Test using a calibrated hygrometer in an airtight enclosure on the slab surface for at least 72 hours, or a carbide (CM) test, taking the pass figure from the covering or adhesive manufacturer’s data since it varies with the type of base. Do not rely on the ‘back of hand’ test, it is unreliable.
Levels: Lay a 2 m straightedge across the floor in multiple directions. Mark all high and low spots. Minor variation (under 15 mm over the full floor area) is correctable with levelling compound. Greater variation may require a full sand-cement screed or a floating screed system.
Bond: Check that any existing screed or render is bonded, tap with a steel bar and listen for hollow sounds. Unbonded sections must be removed before new compound is applied, or the whole build-up will fail.
Timber Subfloor
Movement and bounce: Walk the floor and identify any boards that flex, creak, or move relative to each other. These must be fixed, a flexible substrate cannot support rigid floor coverings including tile or rigid LVT.
Boards vs sheet: Original floorboards (typically 100–125 mm wide tongued-and-grooved softwood) must be covered with 18 mm exterior-grade plywood before tiling or laying rigid LVT. The plywood is screwed at 200 mm centres across the floor, nesting the screws in the board (not in knots or near edges). This creates a continuous, stable sheet surface.
Gaps and voids: Gaps between floorboards should be filled before plywood is laid. On older properties, a ventilated void beneath the floor is normal and healthy, do not block air vents.
Moisture in timber: Timber subfloors should be below 12% moisture content before laying (measured with a pin-type meter). Elevated readings suggest a plumbing leak, condensation, or a subfloor void with inadequate ventilation.
Products: Which Levelling Compound to Use
Primer
All concrete subfloors must be primed before applying levelling compound. Primer seals porosity, prevents the compound drying too fast (which causes cracking and poor flow), and improves adhesion. Most manufacturers supply a matched primer; use it.
Apply primer by brush or roller at the manufacturer’s rate. For very porous or dusty concrete, two coats may be required. Allow to dry to a tacky film, typically 30–90 minutes, before pouring compound.
For plywood-covered timber subfloors, use an appropriate primer formulated for sheet material, standard concrete primers may not bond properly.
Standard Self-Levelling Compound
A pumpable or hand-poured compound suitable for depths of approximately 2–50 mm (check the specific product data sheet, depths vary). Standard compounds achieve structural strength within 2–6 hours and are walkable within 30–60 minutes.
Brands in this category are widely available from builders’ merchants, Ardex, F. Ball, Mapei, and Weber all produce well-regarded products. Mix to the manufacturer’s water ratio consistently, under-watering creates a stiff compound that will not flow to a level surface; over-watering causes a weak surface that dusts.
Supply cost: £3–£8/m² at typical 3–6 mm application depth.4
Fibre-Reinforced Compound
Contains polypropylene or glass fibres for improved crack resistance over timber subfloors. A requirement rather than an option when levelling compound is being applied over a plywood substrate.
Rapid-Setting Compound
Sets hard in 45–90 minutes, allowing the floor covering to be laid the same day. More expensive than standard compound. Useful when programme is tight but more demanding to apply, there is little time to correct poured sections.
Supply cost: £6–£14/m².
Deep-Fill Compound
For depths of 10–80 mm. Typically pump-applied in professional applications. At these depths, a conventional screed (sand and cement, 1:3.5) or a calcium sulphate anhydrite screed is often more cost-effective.
Step-by-Step Application (Concrete Subfloor)
-
Clear the floor and remove all grease, laitance, paint, and adhesive residue. Mechanical preparation (floor grinder, shot blaster, or scarifier) gives the best bond. Grinding produces a smooth surface that receives compound well; shot blasting opens the pores of the concrete for maximum adhesion.
-
Fill large cracks and holes with a suitable repair mortar. Do not rely on self-levelling compound to bridge voids over 5–6 mm, it may crack on shrinkage.
-
Apply primer at the manufacturer’s specification. Ensure all edges and corners are coated. Allow to reach the correct tack.
-
Mix the compound in a clean bucket using a slow-speed drill with a paddle mixer. Pour in the correct weight of water first, then add powder. Mix for 2–3 minutes to a smooth, lump-free consistency.
-
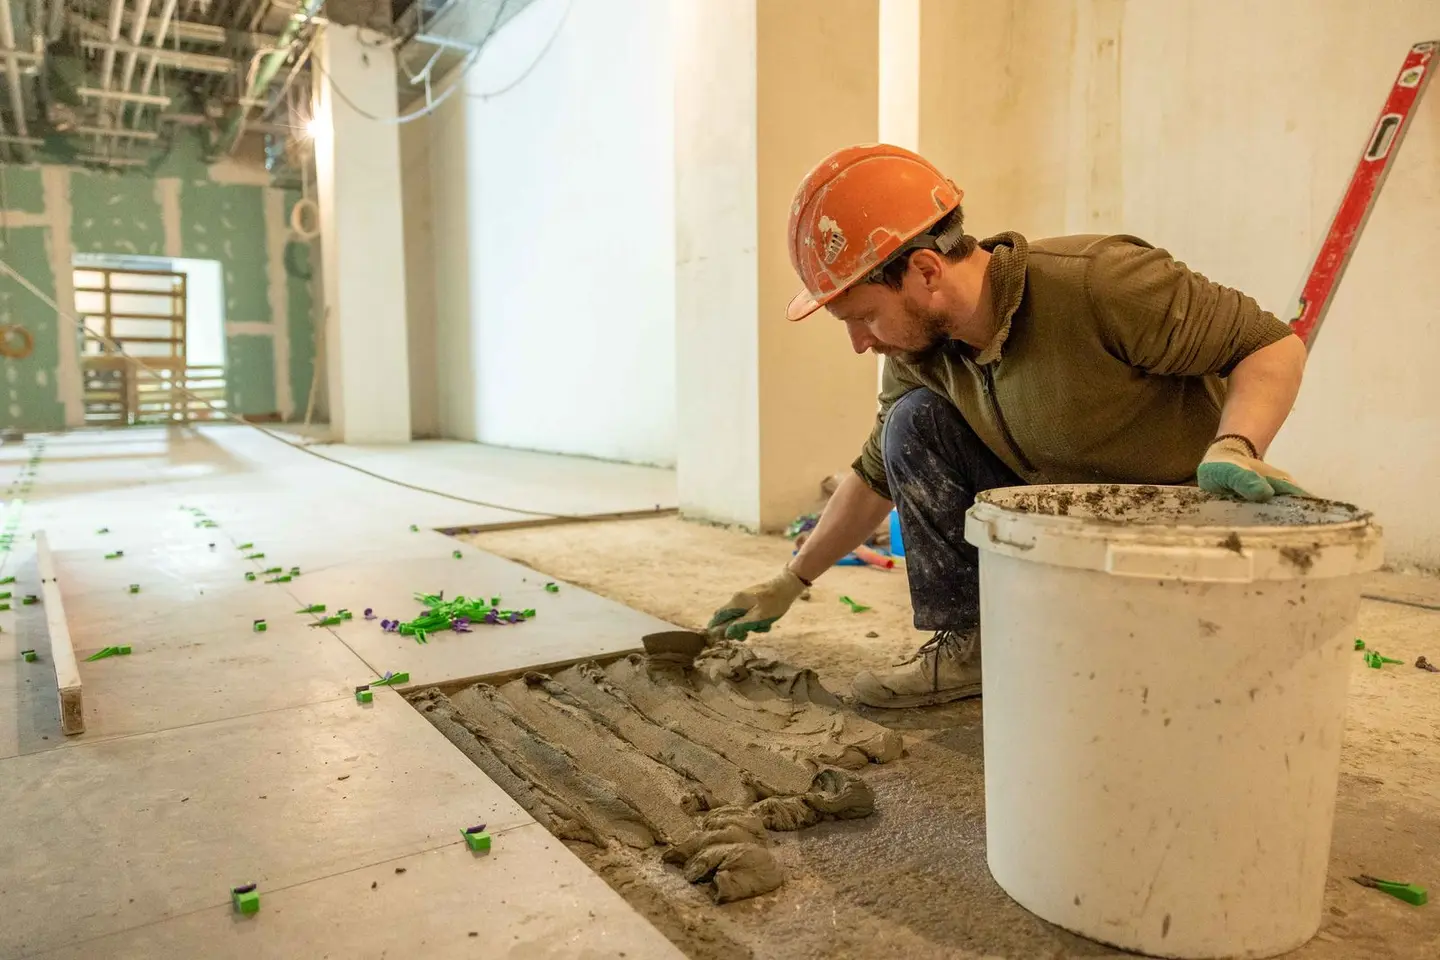
Pour from a point at the back of the room and spread using a gauge rake or smoothing bar. Work quickly, most products have an open time of 5–10 minutes. Pull towards the exit.
-
Use a spiked roller immediately after pouring to release trapped air bubbles from the surface.
-
Close the room against draughts and direct sunlight while curing. Draughts cause surface cracking.
-
Check flatness after curing using the 2 m straightedge. A second thin pour is acceptable if needed.
Damp Proofing Under the Levelling Compound
If your concrete subfloor fails the moisture test, an epoxy damp-proof membrane (DPM) must be applied before levelling compound. Epoxy DPMs are two-part coatings applied by brush or squeegee in two or three coats, each coat typically requires 12–24 hours cure time. The levelling compound is then applied over the cured epoxy.
Do not use polythene sheeting as a DPM under levelling compound, it cannot bond to and will prevent the compound from keying to the slab.
Epoxy DPM supply and application: £8–£15/m².
Costs at a Glance
| Task | Supply (£/m²) | Labour (£/m²) | Total (£/m²) |
|---|---|---|---|
| Priming concrete | £0.50–£1.50 | included below | - |
| Levelling compound (3–6 mm) | £3–£8 | £6–£12 | £9–£205 |
| Levelling compound (rapid-set) | £6–£146 | £6–£12 | £12–£26 |
| Epoxy DPM application | £5–£10 | £5–£10 | £10–£20 |
| Plywood overlay on timber | £8–£15 | £10–£18 | £18–£33 |
| Full preparation (problem floor) | - | - | £25–£50 |
The cited prices in this table were published in 2023 and brought to 2026. What that means.
When to Call a Professional
DIY application of self-levelling compound is feasible in small areas (up to 10–15 m²) with good preparation and careful mixing. Larger areas, uneven substrates requiring deep fills, and floors with moisture issues are better handled by a specialist flooring contractor or screed layer.
A professional will also carry liability if the floor covering subsequently fails due to inadequate preparation, important when the floor covering itself is expensive. Get the preparation included in the flooring contractor’s written quote, with specific reference to the substrate standard (e.g., “surface to be prepared to BS 8203 flatness tolerance”) so expectations are documented.
The rules in this note are those that apply in England. Scotland, Wales and Northern Ireland have their own building standards and permitted development rights.
References (6)
Figures in this note were checked against the sources below on 9 September 2026. Superscript numbers in the text point to them. Every source the site cites, by topic.
- 1technicalstrongBSI (British Standards Institution), a standard.RN-2F1BXPThe current British code of practice for laying a tiled floor, published 31 May 2024. It is the third of what is now a four-part BS 5385 series: Parts 1 and 2 cover internal and external wall tiling, Part 4 covers tiling in special conditions such as wet areas and swimming pools, and Part 3 now covers all rigid flooring. The 2024 revision consolidates and replaces both BS 5385-3:2014 on ceramic and mosaic floor tiling and BS 5385-5:2009 on terrazzo, natural stone and agglomerated stone flooring, so a specification that still cites BS 5385-5 is out of date. Its scope is recommendations for the design, installation and maintenance of floor tiling using ceramic tiles, mosaics, terrazzo tile and slab, natural stone internal and external floorings, and engineered stone for internal flooring. BSI states the revision was driven by ceramic floor tiles becoming thicker and larger, which has made the installation methods for ceramic and stone converge. Covers bedding onto concrete, cement and sand and calcium sulfate screeds, heated screeds, timber and existing hard finishes, plus movement joints and tolerances.
- 2technicalvery strongMinistry of Housing, Communities and Local Government.RN-NPO8FJThe statutory figures behind a damp diagnosis, and the numbers to quote when a note explains why ground levels or a bridged damp proof course cause rising damp. Paragraph 5.2 requires that in an external wall the damp-proof course should be at least 150mm above the level of the adjoining ground (Diagram 8) unless part of the building protects the wall, and that in an external cavity wall the cavity should be taken down at least 225mm below the level of the lowest damp-proof course, or a damp-proof tray provided (Diagram 9a). For suspended timber ground floors it requires a ventilated air space of at least 75mm from the ground covering to the underside of any wall-plates and at least 150mm to the underside of the suspended timber floor or insulation, with ventilation openings on two opposing external walls of not less than 1,500mm2 per metre run of external wall or 500mm2 per square metre of floor area, whichever is greater; for suspended concrete floors the clear ventilated space is at least 150mm with the same opening sizes. Section 2.39 onwards covers radon, referring to BRE Report BR 211 for protective measures. The 2013 edition was published on 3 September 2013 with changes in effect from 1 October 2013.
- 3technicalstrongBSI, a standard.RN-9M7SBGBS 8203:2017, published 31 March 2017 and current. It gives recommendations for the installation of resilient floor coverings, specifically cork, linoleum, plastic (vinyl) and rubber, on both new and existing structures in conventional flooring applications. It includes design-stage considerations that support proper maintenance and long-term performance but excludes cleaning and maintenance guidance itself, and does not cover access flooring or specialised applications such as static-control flooring. This is the reference standard a note should cite for subfloor condition, acclimatisation and adhesive practice for vinyl and LVT.
- 4costsupplier figureSelco Builders Warehouse.RN-5OKG27A price, true at 2026-09. the retail price Selco Builders Warehouse publishes for Ultraplan Renovation Screed 25kg, which is the supply figure the cost book records for this item
- 5costvery strongSell2Wales, Welsh Government, a government page.RN-IM16AKA price, true at 2023, brought forward on the Construction Output Price Index. The plastering lot of a Welsh housing association's responsive maintenance price framework, published on the national procurement portal under the NHF Form of Contract 2023. Competitively tendered rates for plastering tasks at social housing scale. Genuine contract prices, for volume work under a framework, which is a different market from a single domestic job.
- 6costsupplier figureSelco Builders Warehouse.RN-JS484AA price, true at 2026-09. the retail price Selco Builders Warehouse publishes for Bostik Cempolatex Rapid 30 Fast-Setting Self-Levelling Compound 16kg, which is the supply figure the cost book records for this item
-
BS 5385-3:2024 Wall and floor tiling. Design and installation of internal and external ceramic and mosaic, natural stone and terrazzo flooring and internal agglomerated stone flooring in normal conditions. Code of practice, BSI Knowledge, accessed 9 September 2026. knowledge.bsigroup.com
-
Approved Document C, Site preparation and resistance to contaminants and moisture, 2004 edition incorporating 2010 and 2013 amendments, HM Government (GOV.UK), accessed 9 September 2026. assets.publishing.service.gov.uk
-
BS 8203:2017 Code of practice for installation of resilient floor coverings, BSI Knowledge, accessed 9 September 2026. knowledge.bsigroup.com
-
Ultraplan Renovation Screed 25kg, Selco Builders Warehouse, accessed 15 September 2026. Priced at 2026-09, so no calibration is needed. selcobw.com
-
NHF Form of Contract 2023 Price Framework (Lot 4 Plastering), Tai Tarian Responsive Maintenance Framework Agreement ref 01003, sheet of priced M3NHF Version 8 Schedule of Rates, Tai Tarian Ltd, published on Sell2Wales (Welsh Government public procurement portal), accessed 21 September 2026. Priced at 2023; brought to 2026 on the Construction Output Price Index, housing repair and maintenance (Great Britain), published by Office for National Statistics, a factor of 1.0358. sell2wales.gov.wales
-
Bostik Cempolatex Rapid 30 Fast-Setting Self-Levelling Compound 16kg, Selco Builders Warehouse, accessed 15 September 2026. Priced at 2026-09, so no calibration is needed. selcobw.com