The recesses either side of a chimney breast are among the most useful spaces in a Victorian or Edwardian house, and a well-built alcove cupboard with shelving above transforms them from dead space into genuinely practical storage. The job is well within the abilities of a competent DIYer with basic woodworking tools, no specialist skills are required, just careful measuring, a patient approach to scribing to uneven walls, and a willingness to fill and sand for a clean painted finish.
A typical alcove build takes a full weekend. Materials cost £80–£250 depending on the timber and board specification. A carpenter would charge £400–£800 to build the same unit, so the saving is meaningful.
Tools and Materials List
Tools
- Tape measure and pencil
- Spirit level (1.2 m minimum length)
- Combination square
- Hand saw or circular saw with guide rail
- Jigsaw (for scribing curved cuts)
- Power drill/driver with wood bits and masonry bits
- Hammer
- Mallet and chisels
- Block plane or belt sander (for scribing adjustments)
- Caulking gun
- Orbital sander
Materials (standard alcove, ~600 mm wide × 2,100 mm high)
| Item | Quantity | Approx. cost (2026) |
|---|---|---|
| 75 × 25 mm PAR softwood (framing) | 10–14 m | £20–£35 |
| 18 mm MDF or birch plywood (shelves and base) | 1–2 sheets (2440 × 1220 mm) | £30–£70 |
| 25 mm MDF for cupboard carcass panels | 1 sheet | £15–£30 |
| Shaker-style MDF door (pre-primed) or MDF sheet to cut own | 1–2 | £40–£90 |
| Piano hinge or butt hinges (pair) | 1–2 pairs | £5–£15 |
| Magnetic catch | 1–2 | £3–£8 |
| Knob or handle | 1–2 | £5–£25 |
| Wood screws (mixed box) | 1 box | £8–£15 |
| Wall plugs (brown/red) | 20–30 | £3–£5 |
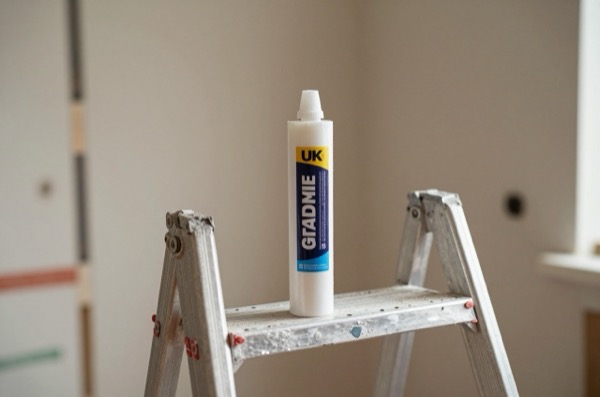
| Decorator’s caulk | 2 tubes | £6–£12 |
| MDF primer and emulsion or eggshell paint | - | £15–£40 |
| PVA glue | 1 litre | £4–£8 |
| Total materials | £80–£250 |
Step-by-Step Instructions
Step 1: Measure the Alcove Carefully
Alcoves, particularly in Victorian houses, are rarely perfectly square or plumb. Measure the width at three heights (floor, mid-point, ceiling) and the depth at both sides. Note the floor-to-ceiling height. The smallest width measurement determines the maximum shelf length without scribing; the biggest discrepancy tells you how much scribing and packing you will need.
Check the floor for level using your spirit level. If it slopes significantly, you will need to pack the base frame up at one side or scribe the base panel to follow the floor.
Step 2: Build the Ledger Frame
The traditional approach is to fix horizontal softwood ledgers, 75 × 25 mm PAR, to the alcove walls at each shelf height. These act as the bearing for the shelf boards. Mark shelf heights in pencil on both walls; use your spirit level to transfer marks across accurately.
Drill and rawlplug into masonry walls. Use brown rawlplugs and 65 mm No. 10 screws for brick or dense block; use specialist hollow-wall anchors if the alcove sits in a stud partition. Fix ledgers at 600 mm centres for shelves up to 900 mm wide, 400 mm centres for heavier loads (books, records).
Step 3: Frame the Cupboard Section
The bottom section will be an enclosed cupboard. Build a simple rectangular frame from 75 × 25 mm softwood:
- Two vertical uprights the height of the cupboard space (typically 700–900 mm)
- Top and bottom horizontal rails
Fix the uprights to the alcove walls using rawlplugs and screws. Check for plumb. The frame provides the fixing point for the door and stiffens the carcass.
Add a base panel of 18 mm MDF or plywood, resting on ledgers at floor level or on a softwood sole plate. A shelf inside the cupboard can be added at mid-height, supported on shelf pins (4 mm dowel holes drilled in vertical MDF side panels) for adjustability.
Step 4: Cut and Fit the Shelves
Cut shelves from 18 mm MDF or birch-faced plywood to the measured width (or fractionally under to allow for scribing). For shelves spanning more than 700 mm, use 25 mm MDF or add a 50 × 25 mm softwood front lipping to prevent sagging under load. Books or records particularly need this, MDF will bow over 700 mm spans at 18 mm thickness under heavy loads.
Scribe the back edge of each shelf if the back wall is uneven: hold the shelf roughly in position, run a pencil and compass along the wall to transfer the wall’s irregularity onto the shelf edge, and cut with a jigsaw. Sand the scribed edge smooth, then drop the shelf onto the ledgers.
Face-fix through the shelf into the ledger from below with 45 mm screws, or use PVA and a brad nailer for a cleaner underside.
Step 5: Fit the Cupboard Door
A pre-primed shaker MDF door (easily sourced from suppliers like Cheshire Mouldings or simply cut from a sheet of 18 mm MDF with a routed profile) should be sized 3–5 mm smaller than the opening on each side to allow for seasonal movement and an even gap.
Use butt hinges (75 mm pressed steel, primed) on the surface of the frame, this is easier than mortising for a painted finish. Two hinges per door are sufficient up to 1.5 kg; add a third for heavier doors. A magnetic catch at the top keeps the door closed without a rebate.
Step 6: Scribe, Fill, Caulk, and Paint
This is the step that makes or breaks the finished result. Working systematically:
- Fill all screw holes and surface defects in MDF with fine surface filler or flexible wood filler. Allow to dry, then sand flush with 120-grit followed by 180-grit.
- Prime all MDF surfaces with a dedicated MDF primer (not standard emulsion, which raises the grain). Two coats, sanding lightly between coats.
- Caulk all joints between the unit and the alcove walls, and between the shelves and wall, with decorator’s flexible caulk. Tool off with a wet finger and allow to dry.
- Paint with two coats of eggshell or satinwood for a durable finish. A mini roller gives the best result on flat MDF surfaces; a brush for any moulded profiles.
Common Mistakes to Avoid
- Not scribing, pushing a shelf hard to an uneven wall creates a visible gap at the sides. Always scribe to the wall.
- Using lightweight fixings in masonry, use proper masonry rawlplugs; gravity toggles or plasterboard fixings are not suitable for shelf ledgers bearing weight.
- Skipping MDF primer, ordinary emulsion applied directly to MDF absorbs unevenly, raises grain fibres, and produces a blotchy finish that no amount of topcoats will correct.
- Over-spanning shelves, 18 mm MDF over 700 mm with book loads will visibly deflect within months. Add front lipping or use 25 mm board.
- Ignoring the floor level, a cupboard built on a sloping floor with no correction will have a door that rubs or a visibly tilted top.
When to Call a Carpenter Instead
The DIY approach works well for standard straight-walled alcoves. Consider hiring a carpenter if:
- The alcove has curved or heavily textured brick walls requiring complex scribing
- You want beaded inframe doors, fielded panel doors, or other detailed joinery
- The chimney breast has an active flue you need to work around (ensure adequate ventilation is maintained)
- You want the unit to look entirely built-in with flush reveals and architrave integration
A carpenter would charge £400–£800 for the equivalent unit, plus materials, and would likely produce a marginally cleaner result in the time saved by experience.