A loft conversion is not a single transaction, it is a sequence of connected decisions, appointments, consents, and construction stages that must happen in roughly the right order for the project to run smoothly. Homeowners who treat it like buying furniture are the ones who end up with delays, disputes, and bills they did not budget for.
This guide walks through every stage from the first measurement to the final Completion Certificate, with realistic timescales and the key decisions at each step.
Step 1: Feasibility Assessment
Before spending money on anything else, establish whether your loft is structurally and geometrically convertible. The core questions are:
- Ridge height: Measure from the top of the ceiling joists (not the plasterboard ceiling below) to the underside of the ridge board. Subtract approximately 220 mm for a structural floor build-up. If you are left with less than 2,000 mm, the project is marginal; less than 1,800 mm and it is usually not viable without significant structural intervention.
- Roof type: Cut roofs (rafters, ridge, purlins) are readily converted. Modern trussed roofs (W-shaped steel-plate truss frames, common from the 1970s onwards) can be converted but require all trusses to be cut back and replaced with new structural support, more complex and expensive.
- Floor joists: Existing ceiling joists are almost never strong enough to become a habitable floor. New structural floor joists at 150–200 mm depth will run alongside or replace them. A structural engineer will design these.
- Access: Where will the staircase land on the first floor? A standard straight flight takes a plan footprint of roughly 2,800 × 900 mm, the 900 mm being the usual width of a domestic stair rather than a regulated minimum: Building Regulations Part K sets no minimum width for a private stair in England, though it does cap the pitch at 42°.1
A structural engineer or specialist loft company will carry out this assessment in a single visit. Fee: £150–£400 for an informal feasibility assessment.
Step 2: Choose Your Conversion Type
The feasibility assessment informs your options. The main types are:
| Type | When suitable | Rough cost range (SE England) |
|---|---|---|
| Velux / rooflight | Ridge height meets minimum; no headroom issue | £25,000–£40,000 |
| Rear dormer | Need more headroom or floor area to rear | £40,000–£60,000 |
| Hip-to-gable | Semi or detached with hipped end | £45,000–£65,000 |
| L-shaped dormer | Victorian terrace with rear return | £45,000–£65,000 |
| Mansard | Maximum space; requires planning permission | £55,000–£90,000 |
Most terraced and semi-detached properties suit a rear dormer. Detached properties often benefit from a hip-to-gable, sometimes combined with a dormer. Velux conversions suit properties with adequate existing headroom.
Step 3: Appoint a Designer
You need architectural drawings for Building Regulations submission and, if required, planning permission. You can use:
- A specialist loft conversion company: many handle design in-house. Convenient but ensure the design is genuinely tailored rather than a template.
- An architect or architectural technician: independent and can help with planning if consent is required. Fees typically £1,500–£3,500 for a loft project.
The designer needs to coordinate with the structural engineer, whose calculations (beam sizes, floor specification, party wall information) feed into the drawings. Typical structural engineer fee: £600–£1,200.
Step 4: Establish Whether Planning Permission Is Needed
Most loft conversions fall within permitted development (PD) rights under the Town and Country Planning (General Permitted Development) (England) Order 2015, as amended. You do not need planning permission if:
- The additional roof volume is within 40 m³ (terraced house) or 50 m³ (detached/semi-detached), including any earlier roof enlargement2
- No part of the extension is higher than the existing ridge2
- Dormer walls and roof use materials similar in appearance to the existing house2
- Nothing extends beyond the existing roof slope on the principal elevation where it fronts a highway2
- The enlargement is set back, so far as practicable, at least 20 cm from the original eaves (this does not apply to the hip-to-gable part of an enlargement)2
- There are no verandas, balconies or raised platforms2
- Side-facing windows are obscure-glazed, and any opening part is at least 1.7 m above the floor of the room2
- The house is not on article 2(3) land (such as a conservation area or an area of outstanding natural beauty) and no Article 4 Direction removes the right2
If any of these conditions are not met, or if the property is listed or in a conservation area, you need full planning permission. The statutory determination period for a householder application is 8 weeks from validation.3 Allow 10–12 weeks to be safe. Fee: £548 in England (2026).4
For permitted development, many homeowners obtain a Lawful Development Certificate (LDC) from the LPA to confirm PD status formally. This protects you at sale and avoids ambiguity. Fee: £274 in England from 1 April 2026, half the £548 householder fee.4
Step 5: Apply for Building Regulations Approval
Converting a loft into living space always needs Building Regulations approval, whether or not planning permission is needed.5 The regulations cover the strength of the new floor, the stability of the existing roof, safe escape from fire, a safely designed stair and sound insulation to the rooms below, as well as insulation (Part L) and electrical work (Part P).5
You have two procedural routes:
Full Plans: Submit drawings and calculations in advance for BCO (Building Control Officer) review and approval before work starts. Gives certainty. The council should decide within 5 weeks, or 2 months if you agree to an extension.6 Fee: £400–£700 for a loft in most councils.
Building Notice: Work can start 2 days after the notice is submitted to Building Control, with no advance drawing submission.6 BCO inspects during construction. Faster start but no pre-build check. Any non-compliance is identified during the build, which can mean abortive work.
Most specialist contractors prefer Full Plans for a loft conversion because the BCO’s advance approval includes structural sign-off, which protects the contractor.
Step 6: Serve Party Wall Notices
If your loft involves work on or near a party wall, or if the new steel beams bear onto a shared wall, the Party Wall etc. Act 1996 requires written notice to all adjoining owners before work starts. For a standard rear dormer:
- Party structure notice (works to the party wall itself): 2 months’ notice required7
- Line of junction notice (new wall at or astride the boundary): 1 month’s notice8
Neighbours can consent in writing, and with their written consent work can start before the notice period ends.7 If they dissent or fail to respond within 14 days, a dispute is deemed to exist and surveyors must be appointed.9 A Party Wall Award (agreement) is then prepared, typically taking 4–8 weeks. Cost: £700–£1,500 per surveyor per wall if a dispute arises.10
Serve notices early, they can run concurrently with Building Regulations approval, saving programme time.
Step 7: Procure a Contractor
With consents (or consents in progress) in hand, obtain at least three quotes from loft conversion specialists. Assess quotes on like-for-like scope, scaffolding, structural calculations, Building Regulations fees, fire doors, and staircase are commonly excluded from lower quotes. See our separate guide on comparing loft conversion quotes.
Specialist contractors typically have 8–12 week lead times from contract to start on site. Sign the contract and pay the agreed deposit (10–20%) to secure your slot.
Step 8: Build Stage: Structure and Waterproofing (Weeks 1–4)
The build starts with scaffold erection, which typically takes 1–2 days. Work then proceeds:
- Temporary weatherproof sheeting positioned at the ridge before any tiles are stripped
- Existing ceiling joists exposed and assessed
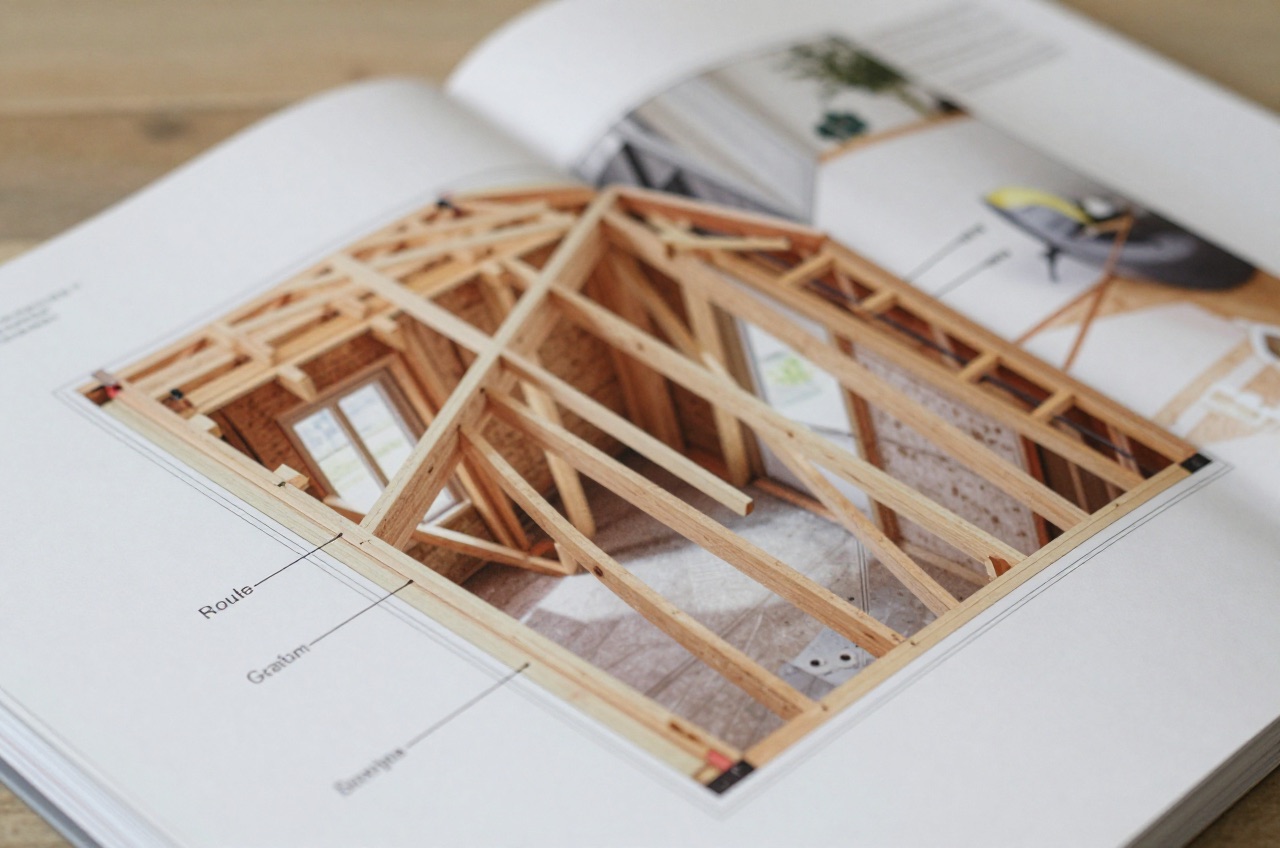
- New structural floor joists installed alongside or replacing existing joists
- Structural steel beams installed (if dormer): typically RSJ or UC sections of 152–203 mm depth, supplied and installed by specialist steelwork contractor
- Dormer or hip-to-gable frame constructed in timber or SIP panels
- New roof covering installed (tiles matching existing; felt and batten)
- Dormer cladding applied (zinc, render, or tile)
- Roof windows fitted and made weathertight
BCO inspection required: structural steelwork and floor structure before plasterboard conceals them.
Step 9: Build Stage: First Fix (Weeks 4–7)
Once the shell is watertight, first-fix trades move in:
- Staircase structure cut through first-floor ceiling and installed
- Stud partitions erected for en-suite, landing, and stair enclosure
- First-fix electrics run (circuits, consumer unit amendment, socket and lighting positions)
- First-fix plumbing run (soil and water for en-suite; hot and cold feeds)
- Insulation between and under the rafters, sized to meet Part L: 0.15 W/m²K for a new roof element such as the dormer, which usually takes more than 100 mm of PIR11
BCO inspection required: insulation before plasterboarding.
Step 10: Build Stage: Second Fix and Finishes (Weeks 6–12)
- Plasterboard fixed to walls, ceiling, and staircase enclosure
- Plasterer skims walls and ceilings
- Second-fix carpentry: skirting, architrave, door linings, internal doors
- Second-fix electrics: sockets, switches, light fittings, extractor fan in en-suite
- Second-fix plumbing: bathroom suite, shower enclosure, radiators
- Tiling in en-suite
- Decoration: primer, two finish coats walls and ceilings
Fire doors: Part B requires fire-resisting doors (typically FD30) to habitable rooms opening onto the escape route. In practice this means fire doors to the loft room and to any rooms below on the escape stair, from loft to final exit.12 Approved Document B’s minimum for those doors is E 20 (FD 20), so FD30 is the common specification rather than the requirement.12
Smoke alarms: a new habitable room above the ground storey means the house needs a fire detection and alarm system.12 Approved Document B asks for mains-powered smoke alarms with a standby power supply, to at least Grade D2 Category LD3 of BS 5839-6, which covers the circulation spaces on every storey, including the new loft landing.12
Step 11: Snagging
Before the BCO final inspection and before final payment, carry out a snagging walk-through with the contractor. Common snagging items:
- Plasterboard joints visible through skim
- Gaps between skirting and wall
- Stair balustrading spindle spacing (max 100 mm gap to prevent child head entrapment, Part K)1
- Roof window handle or opening function
- Water pressure at en-suite
- Smoke alarm test
Document all items in writing and agree a completion date for remediation before releasing final payment.
Step 12: BCO Final Inspection and Completion Certificate
Once snagging is complete, the BCO carries out a final inspection. They will check:
- That the work matches the approved drawings
- Structural elements (where not already signed off at intermediate stage)
- Fire door specification and installation
- Smoke alarm installation and interlink test
- Stair geometry and balustrade
- Insulation specification
If satisfied, the BCO issues a Completion Certificate. This document is essential, mortgage lenders and conveyancers require it on sale, and its absence can delay or prevent a future sale. GOV.UK says you should usually get it within 8 weeks of the work being completed, so chase it if it does not arrive.6
Step 13: Scaffold Strike and Reinstatement
Scaffold is struck after the BCO has completed all required inspections. The scaffolding company reinstates any driveway or pavement protection. Inspect the roof and gutters from ground level after strike to confirm no damage to existing tiles or flashings.
Checklist Summary
| Step | When | Done |
|---|---|---|
| Feasibility assessment | Before design | |
| Conversion type decided | Before design | |
| Designer appointed | Months 1–2 | |
| Planning permission (if needed) | Months 1–3 | |
| Building Regulations Full Plans submitted | Months 1–2 | |
| Party wall notices served | Months 1–2 | |
| Contractor procured | Months 2–4 | |
| Structure and waterproofing | Weeks 1–4 on site | |
| First fix | Weeks 4–7 on site | |
| Second fix and finishes | Weeks 6–12 on site | |
| Snagging | End of build | |
| BCO final inspection | Post-snagging | |
| Completion Certificate received | Post-inspection | |
| Scaffold strike | Post-inspection |
Following this sequence, and allowing adequate time for each stage, is what separates loft conversions that go smoothly from those that generate months of avoidable stress.
References (12)
Figures in this note were checked against the sources below on 30 September 2026. Superscript numbers in the text point to them. Every source the site cites, by topic.
- 1technicalvery strongMinistry of Housing, Communities and Local Government.RN-XH6E39The standard that decides whether a loft ladder is legal and when a raised deck needs a balustrade. Published 3 January 2013, it covers protection from falling, collision and impact including stairs, ladders, ramps, guarding and vehicle barriers. Paragraph 1.31 states that retractable ladders must not be used as a means of escape. Paragraph 1.32 permits a fixed ladder, with fixed handrails on both sides, only for access in a loft conversion containing one habitable room, and only where there is not enough space without altering the existing space for a compliant stair, which is the rule that catches most loft ladder installations. Paragraph 1.29 restricts alternating tread stairs to loft conversions. For a private stair the maximum pitch is 42 degrees (Table 1.1 note 1), the normal relationship between rise and going is twice the rise plus the going between 550mm and 700mm, and for dwellings external tapered steps forming part of the building need a going of at least 280mm. Paragraph 3.1 requires guarding wherever it is reasonably necessary for safety at the edge of a floor, gallery, balcony, roof, light well, basement or similar sunken area. Paragraph 3.2 requires guarding to be at least the height in Diagram 3.1, allows any wall, parapet or balustrade to serve as guarding, and requires it to resist the loads in BS EN 1991-1-1 with its UK National Annex and PD 6688-1-1, with BS 6180 for barrier and infill panel design. Handrails should be positioned 900mm to 1000mm from the pitch line or floor.
- 2technicalvery strongPlanning Portal, guidance.RN-7QVD7IThe Planning Portal on loft conversions: the permitted development volume allowances of 40 cubic metres for a terrace and 50 for a detached or semi-detached house, the rule against extending beyond the front roof plane, the materials condition, and the side-facing window obscure glazing requirement. The source for whether a dormer needs permission, which is the first question every loft conversion turns on.
- 3technicalvery strongMinistry of Housing, Communities and Local Government, guidance.RN-RC9BKDPlanning Practice Guidance on how a council determines an application: the statutory determination periods of 8 weeks for most householder and minor applications and 13 weeks for major ones, extensions of time by agreement, and what happens when the period passes without a decision. This is the source for how long a planning application actually takes and what recourse there is when it takes longer.
- 4technicalvery strongPlanning Portal, guidance.RN-M2KUCTThe Planning Portal's consolidated guide to planning application fees in England from 1 April 2026, built from the 2012 fees regulations as amended and MHCLG's annual indexation. More usable than the regulations themselves because it puts each application type next to its current fee and its definition. The statutory amounts are in the regulations; this is the readable index to them.
- 5technicalvery strongPlanning Portal, guidance.RN-6IW4DXThe Planning Portal's loft conversion guidance. It states that building regulations approval is needed to turn a loft into a liveable room, whatever the planning position.
- 6technicalvery strongGOV.UK, a government page.RN-JYRZYTHow to get building regulations approval: the choice between a full plans application and a building notice, using a competent person scheme instead where the work qualifies, and the determination and appeal routes if approval is refused. This is the page that decides which route a job takes, and the route decides both the fee and how much can go wrong on site before anyone checks.
- 7technicalvery strongThe National Archives (legislation.gov.uk), legislation.RN-C6XFB7A party structure notice must be served at least two months before the date on which the proposed work will begin, and must state the building owner's name and address, the nature and particulars of the proposed work (with plans, sections and load particulars where special foundations are proposed) and the date the work will begin. The notice ceases to have effect if the work has not begun within twelve months of service or is not then prosecuted with due diligence. Two months for a party structure notice against one month for a section 6 excavation notice is the distinction to cite.
- 8technicalvery strongThe National Archives (legislation.gov.uk), legislation.RN-8KXE9KThe section that catches a garden wall built on or up to the boundary, which most homeowners assume the Party Wall Act does not reach. Section 1 applies where lands of different owners adjoin and are either not built on at the line of junction, or are built on only to the extent of a boundary wall that is not a party fence wall or the external wall of a building, and either owner is about to build on any part of the line of junction. Section 1(2) requires a building owner who wants to build a party wall or party fence wall on the line of junction to serve notice on the adjoining owner at least one month before the work is intended to start, describing the intended wall. If the adjoining owner consents under section 1(3), the wall is built half on each owner's land or as otherwise agreed and the cost is shared; the section extends to England and Wales only.
- 9technicalvery strongThe National Archives (legislation.gov.uk), legislation.RN-J0QCZGSection 5 of the Party Wall etc. Act 1996: if an owner served with a party structure notice does not serve a notice consenting within fourteen days, they are deemed to have dissented and a dispute is deemed to have arisen. The provision that makes silence a dispute, which is why a neighbour ignoring the notice triggers the surveyor process rather than allowing the work to proceed unopposed.
- 10costsupplier figureSurvey of Party Wall.RN-JLADBQA price, true at 2026-09. a London party wall surveying practice publishing its own fixed fee, £950 to £1,450 per adjoining owner for a standard extension, broken into the stages it covers: site appraisal, serving the statutory notices, tracking the 14 day response, the schedule of condition, negotiating access, drafting the award and delivery, with VAT added on top. It is also the source for the point the notes most often get wrong, that the fee is per ADJOINING OWNER rather than per job, and that a neighbour who dissents and appoints their own surveyor is paid separately again by the building owner under section 10(11)
- 11technicalvery strongMinistry of Housing, Communities and Local Government.RN-L0FCJXThe in-force U-value tables a DIY insulation or door note must quote, with the exact numbers. Table 4.2, limiting U-values for new fabric elements in existing dwellings, sets roof 0.15, wall 0.18, floor 0.18, swimming pool basin 0.25, window 1.4 or Window Energy Rating Band B minimum, rooflight 2.2, doors with more than 60 per cent of the internal face glazed 1.4 or Doorset Energy Rating Band C minimum, and other doors 1.4 or Doorset Energy Rating Band B minimum. Table 4.3, for existing elements, gives a roof threshold of 0.35 and an improved value of 0.16, which is the figure a loft insulation note needs: paragraph 4.12 says a retained element whose U-value is higher than the column (a) threshold, for example through a loft or garage conversion, should be upgraded to the column (b) value. Paragraph 4.13 allows a lesser upgrade only where the improved value is not technically or functionally feasible or would not achieve a simple payback of 15 years or less. Paragraph 4.8 requires a replacement element to be no worse than the one it replaces as well as meeting Table 4.2. Paragraph 4.10 gives the heritage exception: where character must be maintained, a centre pane U-value of no more than 1.2 or low-emissivity secondary glazing. Note 9 records that the timber window concession of 1.6 or Band C ended on 14 June 2023. The 2021 edition came into force on 15 June 2022; a 2026 edition exists at https://assets.publishing.service.gov.uk/media/69c122a6cfa346b9d4704a55/ADL1_2026.pdf.
- 12technicalvery strongMinistry of Housing, Communities and Local Government.RN-J0UZDBApproved Document B Volume 1, fire safety in dwellings, 2019 edition with the 2020, 2022 and 2025 amendments and the forthcoming 2026 and 2029 changes collated in. Covers means of warning and escape, internal fire spread through linings and structure, external fire spread and access for the fire service. This is the document behind escape window sizes, protected stairways, the 4.5 metre rule and the fire doors a loft conversion needs.
-
Approved Document K, Protection from falling, collision and impact, 2013 edition, Ministry of Housing, Communities and Local Government, accessed 14 September 2026. assets.publishing.service.gov.uk
-
Loft conversion: planning permission, Planning Portal, accessed 30 September 2026. planningportal.co.uk
-
Determining a planning application, Ministry of Housing, Communities and Local Government, accessed 30 September 2026. gov.uk
-
A guide to fees for Planning Applications in England, from 1 April 2026, Planning Portal, accessed 7 September 2026. ecab.planningportal.co.uk
-
Is building regulations approval needed for a loft conversion?, Planning Portal, accessed 30 September 2026. planningportal.co.uk
-
Building regulations approval: how to apply, GOV.UK, accessed 30 September 2026. gov.uk
-
Party Wall etc. Act 1996, section 3: Party structure notices, The National Archives, accessed 30 September 2026. legislation.gov.uk
-
Party Wall etc. Act 1996, section 1: New building on line of junction, The National Archives, accessed 30 September 2026. legislation.gov.uk
-
Party Wall etc. Act 1996, section 5: Disputes arising under sections 3 and 4, The National Archives, accessed 30 September 2026. legislation.gov.uk
-
Fixed-Fee Party Wall Surveyor Cost London 2026 Guide, Survey of Party Wall, accessed 17 September 2026. Priced at 2026-09, so no calibration is needed. surveyofpartywall.co.uk
-
Approved Document L, Conservation of fuel and power, Volume 1: Dwellings, 2021 edition incorporating 2023 amendments, Ministry of Housing, Communities and Local Government, accessed 30 September 2026. assets.publishing.service.gov.uk
-
Approved Document B (fire safety) volume 1: Dwellings, 2019 edition incorporating 2020, 2022, 2025 and 2026 amendments, Ministry of Housing, Communities and Local Government, accessed 14 September 2026. assets.publishing.service.gov.uk