You do not need to pay £200 for a professional energy assessment to identify where your home is wasting energy. A systematic DIY audit, working methodically through the building fabric, heating system, hot water and appliances, takes a single afternoon and will produce a prioritised list of improvements. Many of the issues you will find cost less than £50 to fix and pay back within a few months.
This guide follows the sequence that energy assessors use: start with the biggest heat losses (roof, walls, floor, windows), move to the heating system, then look at hot water, ventilation and appliances. At the end you will have a clear picture of where your money is going and what to do first.
Before You Start: Gather Your Bills
Pull together 12 months of gas and electricity bills or smart meter data. Note your total annual consumption in kWh and your total spend. A typical three-bedroom semi-detached in England uses 11,500 kWh of gas and 3,100 kWh of electricity per year. If you are using substantially more than this, the audit will likely reveal why.
Also locate your property’s EPC (Energy Performance Certificate) at the GOV.UK EPC register, it is free and lists the current rating, recommended measures and estimated savings. Use it as a starting point, not a conclusion.
Step 1: Roof and Loft Insulation
Check: Open the loft hatch and look. Is there insulation? How deep is it? 270 mm is the figure everyone quotes, but it is a rule of thumb rather than a rule. Building Regulations set a U-value for the roof, not a depth: 0.16 W/m²K for an existing roof being renovated and 0.15 W/m²K for a new roof formed in an existing dwelling.1 At the 0.044 W/mK conductivity of ordinary loft roll, 0.16 needs closer to 300 mm, and 270 mm was the number when the target was looser. Insulation that predates 2006 is often only 100 mm deep.
What to look for:
- No insulation: installing 270 mm costs £300–£600 DIY or £400–£900 professionally; typical saving £200–£300/year
- Thin insulation (under 100 mm): topping up to 270 mm costs £200–£500; saving £100–£175/year
- Uninsulated or poorly sealed loft hatch: add draught-strip and 50 mm insulation board to the hatch lid, costs under £20; saves £10–£30/year
- Uninsulated water tanks and pipes in the loft: jacket and pipe lagging cost £10–£30; prevents freezing and reduces standing heat loss
Step 2: Cavity Wall Insulation
Check: Look at the outside of your property. If it was built between 1920 and 1990 and has a brick outer skin with a gap before the inner leaf (you can check by measuring wall thickness, cavities give a wall of 265–310 mm total depth versus 220–250 mm for solid walls), it almost certainly has a cavity. Check whether it has been filled, if you do not know, a local cavity wall insulation installer will carry out a borescope check for free.
Cavity wall insulation costs £500–£1,500 installed (depending on house size) and can save £150–£300/year. It is one of the highest-return interventions available for cavity-wall properties. The Great British Insulation Scheme closed on 31 March 2026, but check eligibility for ECO4 funding via your energy supplier, many households qualify for funded or heavily subsidised installation.2
Step 3: Floors
Check: Lift a corner of carpet or look at skirting board gaps. In suspended timber ground floors, there is often a significant air gap between floorboards. Gaps between boards, and between boards and skirting, allow cold air from the sub-floor void to enter the room.
- Seal gaps with flexible filler or specially sized timber strips
- Fit draught-proof strips around the perimeter under the skirting
- Underfloor insulation (between the joists from below, or rigid board above if carrying out works): costs £800–£2,000 for a professional install; saving £50–£120/year
Solid concrete ground floors lose heat by conduction but cannot be insulated without raising the floor level by 100–150 mm (rigid insulation + screed), which is a major project only worth doing during a kitchen or bathroom renovation.
Step 4: Windows and Glazing
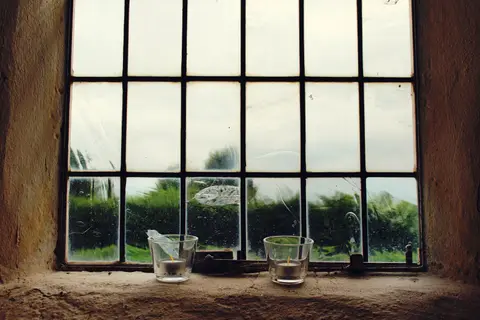
Check: On a cold day, hold your hand close to each window pane and frame. Single-glazed windows feel noticeably cold; the draught from poorly fitting frames is often detectable. Also check:
- Are glazed units fogged or showing condensation between panes? The seal has failed, the unit needs replacing, not the whole frame
- Are opening lights fitting squarely in their frames? A twisted sash or casement that does not close flush loses substantial heat
| Window Type | U-value (W/m²K) | Indicative Saving vs. Single Glaze |
|---|---|---|
| Single glazing | 5.0–5.8 | - |
| Old double glazing (pre-2002) | 2.8–3.2 | £80–£100/yr (typical house) |
| Modern double glazing (A-rated) | 1.4–1.6 | £160–£195/yr |
| Triple glazing | 0.8–1.0 | £195–£220/yr |
Draught-proofing window frames (silicone bead to frame, compression strip to opening lights): costs £10–£30 per window DIY; saving £5–£15 per window per year.
Step 5: Draughts: Doors, Floors and Services
Draughts account for up to 25% of heat loss in older UK homes. Systematic draught-proofing is one of the cheapest and fastest-payback improvements available.
Checklist:
- External door frames: fit brush or compression strip draught excluders; £5–£15 per door
- Letter boxes: fit a brush excluder; £8–£15
- Keyholes: fit a cover plate; £2–£5
- Loft hatch: seal as above
- Redundant fireplace: fit a chimney balloon or seal the register plate; £15–£30; saving £80–£150/year per chimney
- Open flue gas fires and back boilers: check whether the pilot light is drawing air continuously even in summer, these can lose £100–£150/year when not in use
- Service penetrations: where pipes and cables enter walls, fill gaps with fire-rated expanding foam
Step 6: Heating System
Check your boiler:
- Note the installation date and model. Boilers over 15 years old are likely running at below 80% efficiency. An A-rated condensing boiler runs at 90–94% efficiency
- Is the boiler set to heat water on a schedule, or running continuously?
- Is the flow temperature set correctly? Modern condensing boilers should run at 60°C flow / 45°C return to achieve condensing mode; many older installations have these set to 80°C, preventing condensing and wasting significant energy
Check the controls:
- Room thermostat fitted and working? A 1°C reduction in thermostat setting saves approximately 3% on heating bills
- Thermostatic radiator valves (TRVs) on all radiators except the one in the room with the room thermostat?
- Timer/programmer set correctly for your occupancy pattern?
- Hot water cylinder thermostat set to 60°C (legionella control minimum)?
Step 7: Appliances and Lighting
Appliances and lighting account for 15–20% of home energy use. Key checks:
- Fridge/freezer: check the door seal (a piece of paper should not pull out easily when the door is shut on it). Old A+ fridges use 200–300 kWh/year; modern D-rated units use 80–120 kWh/year
- Washing machine: wash at 30°C unless heavily soiled; run full loads only; reduces energy use by 35–45% vs 60°C
- Lighting: replace any remaining halogen bulbs with LED equivalents (saves £5–£12/bulb/year)
- Standby power: typical UK home wastes £35–£55/year on standby; use smart plugs or switch off at the socket
Prioritisation Table
| Measure | DIY Cost | Annual Saving | Payback |
|---|---|---|---|
| Loft insulation top-up | £200–£400 | £100–£175 | 1–3 years |
| Draught-proofing (doors, letterbox, chimney) | £30–£80 | £80–£200 | Under 1 year |
| LED lighting (whole house) | £50–£150 | £80–£130 | 1 year |
| Smart thermostat | £150–£250 installed | £75–£150 | 1–2 years |
| Cavity wall insulation | £500–£1,500 | £150–£300 | 3–5 years |
| Boiler controls upgrade | £200–£600 | £60–£120 | 3–5 years |
Work from the top of this list downwards. Fabric-first (insulation and draught-proofing) before systems, and systems before renewables.
References (2)
Figures in this note were checked against the sources below on 14 September 2026. Superscript numbers in the text point to them. Every source the site cites, by topic.
- 1technicalvery strongMinistry of Housing, Communities and Local Government.RN-L0FCJXThe in-force U-value tables a DIY insulation or door note must quote, with the exact numbers. Table 4.2, limiting U-values for new fabric elements in existing dwellings, sets roof 0.15, wall 0.18, floor 0.18, swimming pool basin 0.25, window 1.4 or Window Energy Rating Band B minimum, rooflight 2.2, doors with more than 60 per cent of the internal face glazed 1.4 or Doorset Energy Rating Band C minimum, and other doors 1.4 or Doorset Energy Rating Band B minimum. Table 4.3, for existing elements, gives a roof threshold of 0.35 and an improved value of 0.16, which is the figure a loft insulation note needs: paragraph 4.12 says a retained element whose U-value is higher than the column (a) threshold, for example through a loft or garage conversion, should be upgraded to the column (b) value. Paragraph 4.13 allows a lesser upgrade only where the improved value is not technically or functionally feasible or would not achieve a simple payback of 15 years or less. Paragraph 4.8 requires a replacement element to be no worse than the one it replaces as well as meeting Table 4.2. Paragraph 4.10 gives the heritage exception: where character must be maintained, a centre pane U-value of no more than 1.2 or low-emissivity secondary glazing. Note 9 records that the timber window concession of 1.6 or Band C ended on 14 June 2023. The 2021 edition came into force on 15 June 2022; a 2026 edition exists at https://assets.publishing.service.gov.uk/media/69c122a6cfa346b9d4704a55/ADL1_2026.pdf.
- 2technicalvery strongOfgem.RN-RDOIJRThe scheme, formerly known as ECO+, ran from April 2023 to 31 March 2026 and is now closed. It obliged medium and large energy suppliers to deliver measures reducing energy use in the least energy-efficient homes in Great Britain. Eligibility was homes with an EPC rating of D to G in Council Tax bands A to D in England, or A to E in Scotland and Wales, plus low-income and vulnerable households. Unlike ECO4, which funds whole-house packages, GBIS mostly delivered a single insulation measure per home. This is the page to cite when a note has to say a grant route has closed rather than leave a reader chasing it.
-
Approved Document L, Conservation of fuel and power, Volume 1: Dwellings, 2021 edition incorporating 2023 amendments, Ministry of Housing, Communities and Local Government, accessed 14 September 2026. assets.publishing.service.gov.uk
-
Great British Insulation Scheme, Ofgem, accessed 7 September 2026. ofgem.gov.uk