A vaulted or sloped ceiling, where the ceiling plane follows the roof pitch rather than running flat at joist level, is one of the more demanding insulation jobs in domestic construction. Unlike a cold loft where you simply lay rolls between joists, a vaulted ceiling requires a warm roof approach: insulation must fill the rafter void without leaving a cold bridge, while still allowing any necessary ventilation above the insulation layer.
Done properly, vaulted ceiling insulation can reduce heat loss through the roof by 70–80% compared to an uninsulated pitched ceiling. Building Regulations Approved Document L puts the roof at 0.16 W/m²K in a new dwelling and 0.15 W/m²K for a new roof element in an existing one, which is what a vaulted ceiling formed during a conversion or extension is.1 A roof being renovated rather than newly formed is held to 0.16. 0.18 is the wall and floor figure and does not apply to a roof. This guide covers the full five-step process, the insulation types available, and the common mistakes to avoid.
Tools and Materials
| Item | Notes |
|---|---|
| PIR rigid insulation boards (e.g. 50 mm, 70 mm, 100 mm) | Foil-faced both sides; cut to size with a panel saw or Stanley knife |
| Mineral wool batts (between-rafter layer, if using hybrid build-up) | Friction-fit; width should match rafter spacing |
| Plasterboard (12.5 mm or 15 mm) | Final finish layer; vapour-check grade if not using a separate VCL |
| Tape measure and pencil | For marking rafter spacing and board lengths |
| Panel saw or fine-tooth handsaw | PIR cuts cleanly with a sharp blade |
| Stanley knife and straight edge | Score-and-snap works well on PIR up to 50 mm |
| Expanding foam (low-expansion) | Seal gaps at board edges to prevent cold bridging |
| PIR tape or foil tape | Tape all board joints and perimeter edges |
| Timber battens (25 × 50 mm) | Create counter-batten layer to fix plasterboard and run services |
| Screws (drywall, 55 mm and 75 mm) | Fix plasterboard to battens |
| Cordless drill and bits | |
| Safety glasses, dust mask (FFP3), gloves | Mineral wool is irritating; PIR dust requires respiratory protection. HSE puts construction dust at an assigned protection factor of 20, which means an FFP3 disposable or a half mask with a P3 filter, not an FFP2 |
| Scaffold tower or hop-up (for ceiling height work) | Do not work from a stepladder on ceiling insulation jobs |
Step 1: Assess Rafter Depth and Choose Your Build-Up
Before buying anything, measure your rafter depth. Expose a section of existing ceiling if necessary. UK rafters in pre-1960s housing are commonly 100 mm deep; 1960s–1990s houses often have 150 mm rafters; modern timber frame and engineered roof structures may run to 200 mm or more.
Your target U-value, 0.15 W/m²K for a new roof element in an existing dwelling, dictates how much total insulation thickness you need. Note that the thicknesses below were worked to the older 0.18 assumption and will need increasing by roughly 20 to 25 mm of PIR to reach 0.15. For PIR (polyisocyanurate) rigid boards, which have a thermal conductivity (lambda value) of approximately 0.022–0.024 W/mK, you typically need:
| Total PIR Thickness | Approximate U-Value (no thermal bridge) |
|---|---|
| 100 mm | ~0.22 W/m²K |
| 120 mm | ~0.18 W/m²K |
| 150 mm | ~0.14 W/m²K |
| 200 mm | ~0.10 W/m²K |
If your rafter depth is 150 mm, a single between-rafter layer filling most of the void plus a 50 mm continuous layer below the rafters is a common build-up for Part L compliance. Shallower rafters (100 mm) require a thicker continuous layer below to compensate.1
Ventilation requirement: A traditional cold roof needs a 50 mm clear air gap between the insulation and the roof deck. A warm roof (fully filled, no air gap) requires specific membrane and felt detailing above, this is the correct approach for insulating from below during a renovation. If you are unsure which approach your roof uses, inspect the roof felt above the rafters before proceeding.
Step 2: Choose Insulation Type
Three main insulation types suit vaulted ceilings. Each has trade-offs:
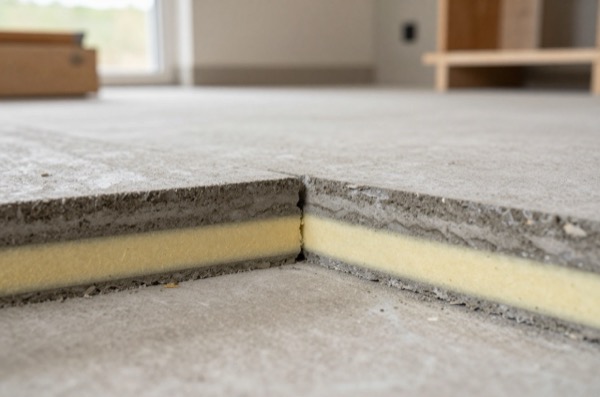
PIR/PUR rigid boards are the most common choice for rafter-depth and continuous-layer installation. They offer the highest thermal performance per millimetre (lambda ~0.022–0.024 W/mK), come in standard 1,200 × 2,400 mm sheets, and are straightforward to cut. Foil facing acts as a vapour control layer (VCL) if joints are properly taped.
Mineral wool batts between rafters plus PIR below is a hybrid approach that suits deeper rafter profiles. Mineral wool friction-fits between rafters with no adhesive needed (lambda ~0.035–0.040 W/mK) and is cheaper per m³ than PIR. A continuous PIR board below the rafters eliminates the cold-bridge effect of the timber rafters themselves, this is important, because rafters at 400 mm or 600 mm centres conduct heat directly if not broken by a continuous insulation layer.
Spray polyurethane foam (SPF) fills the rafter void completely and air-seals the space. However, spray foam applied to roof timbers has caused significant mortgage and property valuation problems in the UK, lenders increasingly refuse to mortgage properties where spray foam has been applied to roof rafters, and removal can be expensive. Spray foam applied from below to a vaulted ceiling (not to the roof structure itself) is less problematic, but confirm the implications with a structural engineer and your mortgage lender before proceeding.
Step 3: Install Insulation Between Rafters
With rafters exposed (or new build at first-fix stage), cut insulation to fit the rafter bays.
For mineral wool batts: cut to width so the batt is 5–10 mm wider than the clear rafter spacing. This slight compression creates a friction fit without gaps at the edges. Push batts up firmly against the roof deck or roof felt. For a warm roof with no ventilation gap, fill the full rafter depth or leave a small gap at the top for the layer sequence your roof requires.
For PIR boards between rafters: cut boards to the exact rafter clear width minus 2–3 mm, so they slide in without forcing. Fix in place with dabs of low-expansion foam at the edges, then run PIR tape along all four edges where the board meets the rafter face. This foam-and-tape seal is critical, any gap becomes a cold bridge and a potential condensation point.
Use expanding foam sparingly to fill any irregular gaps at rafter ends and around any services. Do not use standard filler or mortar, they do not accommodate the slight movement of timber rafters over seasonal cycles.
Step 4: Install a Continuous Insulation Layer Below Rafters
A single between-rafter layer insulates the cavity but leaves the rafters themselves as thermal bridges running from the cold roof deck to the warm interior. In a standard 400 mm rafter-centre layout, timber occupies roughly 12–15% of the ceiling area, enough to measurably reduce overall U-value performance.
Fix a continuous layer of PIR board across the underside of all rafters. Use 50–100 mm PIR boards depending on the total thickness required for your target U-value. Secure with drywall screws through the PIR into the rafter face; pre-drilling prevents the boards splitting at the edges.
Tape all board joints with foil tape. Where boards meet walls, tape the perimeter joint. This continuous foil-faced layer acts as the vapour control layer for the ceiling assembly, it must be as airtight as possible to prevent interstitial condensation within the rafter void.
If you need to run electrical cables below the rafters (recessed downlights into a vaulted ceiling are a significant source of heat loss), create a service zone between the PIR layer and the plasterboard by fixing 25 × 50 mm timber battens across the PIR at 400 mm centres. This avoids penetrating the VCL for cable runs.
Step 5: Fix Plasterboard and Finish
Fix 12.5 mm vapour-check plasterboard (or standard 12.5 mm plasterboard if the PIR foil is acting as the VCL) to the battens or directly to the PIR surface using appropriate drywall screws. On a sloped ceiling, work from the top of the slope downward, this lets each board bear slightly against the one below while you fix it.
Tape and skim all plasterboard joints with board finish plaster. Where the vaulted ceiling meets a flat ceiling or wall, use a solid timber or steel angle bead to create a clean transition.
Minimum plasterboard thickness for fire compliance: 12.5 mm plasterboard on habitable ceilings meets the minimum 30-minute fire resistance requirement in most domestic situations. Check with your Building Control officer if the vaulted ceiling is above a bedroom in a two-storey property, enhanced fire protection may be required.
Common Mistakes
Not taping PIR board joints. Even a 2 mm gap between boards allows warm moist air to reach the cold rafter void, causing condensation and eventually timber rot. Every joint must be taped.
Leaving the rafters as the only fixings. PIR board between rafters with no continuous layer below eliminates the cavity thermal bridge but not the rafter thermal bridge. Always add a continuous layer.
Using spray foam on roof timbers. This applies to spray foam applied to the roof deck or sarking felt above, it is distinct from internal installation but worth knowing before any contractor suggests it.
Skipping a ventilation gap on a cold roof. If your roof is detailed as a cold roof (with ventilation above the insulation), do not fill the entire rafter depth. Consult your roof structure before proceeding if uncertain.
Ignoring airtightness at eaves and ridges. The continuous insulation and VCL layer must be sealed at the eaves (where ceiling meets wall) and at the ridge. These junctions are the most common failure points.
Cost Per Square Metre
| Build-Up | Approximate Material Cost per m² | Installed Cost per m² (inc. labour) |
|---|---|---|
| Mineral wool between rafters + 50 mm PIR below | £18–£302 | £40–£65 |
| Full-fill PIR between rafters + 50 mm PIR below | £28–£45 | £55–£803 |
| 150 mm continuous PIR only (shallow rafters) | £32–£50 | £60–£85 |
The cited prices in this table were published in 2024 and brought to 2026. What that means.
Installed costs assume a ceiling area of 15–30 m². Smaller areas carry proportionally higher per-m² labour costs.
When to Get a Professional
Vaulted ceiling insulation is a viable DIY project if the ceiling is accessible from inside and the rafter layout is straightforward. Call a professional, ideally an insulation contractor experienced in warm roof systems or a building contractor, when: the vaulted ceiling is over a bedroom requiring fire-rated board specification; there is any sign of existing damp or condensation staining on the rafters (investigate the cause before insulating, not after); the roof detailing at eaves and ridge is complex; or you need a Building Control completion certificate, which may require a professional to sign off the build-up and U-value calculation.
The rules in this note are those that apply in England. Scotland, Wales and Northern Ireland have their own building standards and permitted development rights.
References (3)
Figures in this note were checked against the sources below on 14 September 2026. Superscript numbers in the text point to them. Every source the site cites, by topic.
- 1technicalvery strongMinistry of Housing, Communities and Local Government.RN-L0FCJXThe in-force U-value tables a DIY insulation or door note must quote, with the exact numbers. Table 4.2, limiting U-values for new fabric elements in existing dwellings, sets roof 0.15, wall 0.18, floor 0.18, swimming pool basin 0.25, window 1.4 or Window Energy Rating Band B minimum, rooflight 2.2, doors with more than 60 per cent of the internal face glazed 1.4 or Doorset Energy Rating Band C minimum, and other doors 1.4 or Doorset Energy Rating Band B minimum. Table 4.3, for existing elements, gives a roof threshold of 0.35 and an improved value of 0.16, which is the figure a loft insulation note needs: paragraph 4.12 says a retained element whose U-value is higher than the column (a) threshold, for example through a loft or garage conversion, should be upgraded to the column (b) value. Paragraph 4.13 allows a lesser upgrade only where the improved value is not technically or functionally feasible or would not achieve a simple payback of 15 years or less. Paragraph 4.8 requires a replacement element to be no worse than the one it replaces as well as meeting Table 4.2. Paragraph 4.10 gives the heritage exception: where character must be maintained, a centre pane U-value of no more than 1.2 or low-emissivity secondary glazing. Note 9 records that the timber window concession of 1.6 or Band C ended on 14 June 2023. The 2021 edition came into force on 15 June 2022; a 2026 edition exists at https://assets.publishing.service.gov.uk/media/69c122a6cfa346b9d4704a55/ADL1_2026.pdf.
- 2costsupplier figureLawsons (Whetstone) Ltd.RN-2DAE36A price, true at 2026-09. the retail price Lawsons (Whetstone) Ltd publishes for PIR Insulation, which is the supply figure the cost book records for this item
- 3costvery strongValuation Office Agency, a government page.RN-RSLGJ5A price, true at 2024-04, brought forward on the Construction Output Price Index. The Valuation Office Agency's Rating Cost Guide 2026: estimated replacement costs per square metre for building types, used by the VOA for contractor's basis rating valuations. Each code gives a construction description, the unit of measurement and an ERC at a UK mean location factor of 1.00. It is official, free and unusually comprehensive, and it is a replacement cost for rating rather than a market tender price, which is why the guidance notes matter as much as the table.
-
Approved Document L, Conservation of fuel and power, Volume 1: Dwellings, 2021 edition incorporating 2023 amendments, Ministry of Housing, Communities and Local Government, accessed 14 September 2026. assets.publishing.service.gov.uk
-
PIR Insulation, Lawsons (Whetstone) Ltd, accessed 18 September 2026. Priced at 2026-09, so no calibration is needed. lawsons.co.uk
-
Rating Cost Guide 2026, Valuation Office Agency, accessed 21 September 2026. Priced at 2024-04; brought to 2026 on the Construction Output Price Index, housing repair and maintenance (Great Britain), published by Office for National Statistics, a factor of 1.0239. assets.publishing.service.gov.uk