Sealant and caulk are often used interchangeably, but they’re distinct products designed for different jobs. Get the choice wrong and you’ll either be re-doing the job within a year (acrylic caulk in a shower) or painting over a joint that refuses to take primer (silicone where you needed caulk). This guide cuts through the confusion, explains when to use each type, and walks you through a clean application technique.
Sealant vs Caulk: What’s the Difference?
In UK trade usage:
- Sealant refers broadly to any compound that fills and seals a joint to prevent water, air, or sound passing through. Silicone is the most common type.
- Caulk typically refers to acrylic or latex-based compounds, paintable, smooth, and suited to interior decorating joints.
Both are sold in 300 ml cartridges for skeleton (caulking) guns, or in smaller squeeze tubes for occasional use.
Silicone Sealant
Properties
Silicone is a flexible, waterproof polymer. Once cured, it can stretch and compress with building movement without cracking or losing adhesion, typical elongation at break is 200–600% depending on grade. It remains effective from around −40°C to +180°C, making it suitable for pipe joints, boiler flues, and external applications as well as wet rooms.
Silicone is available in standard and low-modulus formulations. Low-modulus (LM) silicone is more flexible and is preferred for internal corners and areas subject to frequent movement (baths, shower trays, window frames) because it places less stress on tiles and surfaces when the building moves.
Types
| Type | Best for |
|---|---|
| Sanitary / bathroom silicone | Baths, showers, basins, includes fungicide |
| Neutral-cure silicone | Glass, metals, painted surfaces, doesn’t corrode |
| Acetoxy-cure (acetic acid cure) | General purpose; vinegar smell during cure |
| Fire-rated silicone | Around pipes and cable penetrations through fire barriers |
| High-temperature silicone | Boiler flues, stove surrounds (rated to 300°C+) |
| External glazing silicone | Windows, roof lights, curtain walling |
Cost
- Standard sanitary silicone (310 ml): £4–£8
- Premium low-modulus (310 ml): £8–£15
- Fire-rated silicone: £10–£20
When to use silicone
- The joint around a bath, shower tray, or basin (where it meets tiles or the wall)
- Around taps, shower fixtures, and pipework
- External window and door perimeters
- Movement joints in tiling
- Around roof penetrations and flashings
Do not use silicone where you need to paint over the joint, even silicone labelled “paintable” rarely accepts paint reliably. Also avoid on natural stone without checking compatibility, as some acetoxy-cure silicones can stain porous stone.
Acrylic Caulk
Properties
Acrylic (or latex) caulk is water-based, flexible enough for small interior movement, and crucially, fully paintable once cured. It can be smoothed with a wet finger or damp cloth and accepts emulsion or satinwood paint within 1–4 hours. It cleans up easily with water before it cures.
The limitation is moisture resistance: acrylic caulk softens and eventually fails in persistently wet conditions. It is not suitable for shower enclosures or external applications.
Types
| Type | Best for |
|---|---|
| Decorator’s caulk | Skirtings, architraves, coving, standard interior use |
| Flexible acrylic caulk | Areas with moderate movement (where walls meet ceilings) |
| Acoustic caulk | Around service penetrations in party walls for sound control |
| Fireproof / intumescent caulk | Pipe and cable penetrations through fire-rated partitions |
Cost
- Decorator’s caulk (380 ml): £3–£6
- Flexible / premium caulk (310 ml): £5–£10
When to use acrylic caulk
- Filling the gap between skirting boards and walls before painting
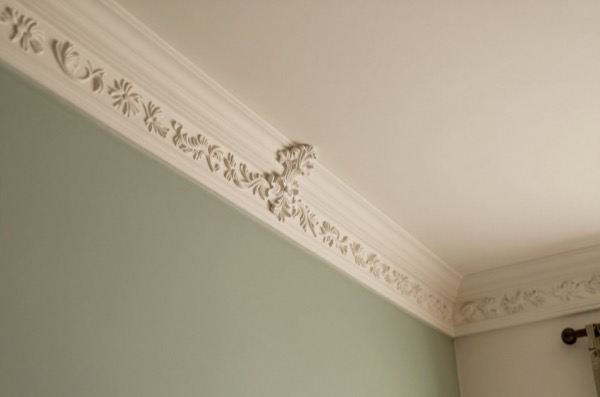
- Sealing coving, architrave, and door frame joints
- Filling cracks in plaster or dry lining before redecoration
- Around window boards on interior sills
- Any painted joint where a neat, smooth finish is needed
Comparison Table
| Property | Silicone | Acrylic caulk |
|---|---|---|
| Waterproof | Excellent | Poor in prolonged wet |
| Paintable | No (or very poorly) | Yes |
| Flexibility / movement | Excellent (200–600% elongation) | Moderate |
| Durability in wet areas | 10–20 years | 1–3 years (wet); longer (dry) |
| Mould resistance | Available (sanitary grades) | Some grades, less effective |
| Clean-up before cure | Methylated spirit | Water |
| Typical cure time | 24 hours (skin); 7 days (full) | 2–4 hours (skin); 24 hours (full) |
| Cost per tube | £4–£15 | £3–£10 |
How to Apply Sealant Cleanly
A neat sealant bead is one of those finishing jobs that separates a professional result from an amateur one. The technique is the same for silicone and acrylic:
Tools needed: skeleton gun (or squeeze tube), craft knife or cartridge cutter, masking tape, smoothing tool or wet finger, methylated spirit (silicone) or water (acrylic), clean cloths.
- Prepare the surface. Remove any old sealant completely using a sealant remover tool or craft knife. Residual old sealant will prevent adhesion. Clean the joint with methylated spirit (silicone) or sugar soap (acrylic) and allow to dry fully.
- Mask the joint. Apply masking tape on both sides of the joint, leaving the gap exposed. This gives you a clean, straight edge without the need for a perfectly steady hand.
- Cut the cartridge nozzle. Cut at a 45° angle to give a bead roughly 5–6 mm wide for a standard bath or window joint. Start with a smaller hole, you can always cut more off.
- Apply the bead. Hold the gun at 45° and pull it steadily towards you while pressing the trigger. A consistent speed gives a consistent bead. Don’t stop and start if you can help it.
- Smooth the joint. Immediately run a wet finger or a proprietary smoothing tool along the bead to press it into the joint and create a concave profile. Work in one smooth motion.
- Remove the tape. Pull the masking tape off while the sealant is still wet, pulling away from the joint at 45°.
- Clean up. Remove any smears immediately with methylated spirit (silicone) or a damp cloth (acrylic) before they skin over.
Allow sanitary silicone a full 24 hours before exposing to water; ideally 48 hours. Acrylic caulk can be painted after 2–4 hours in good conditions.
Common Mistakes to Avoid
- Applying over old sealant, the new sealant won’t bond properly and will fail early.
- Using acrylic caulk around a bath or shower, it will turn black with mould within months.
- Using acetoxy silicone on natural stone, the acetic acid can cause staining on marble and limestone.
- Cutting the nozzle too wide, a large bead is harder to smooth and looks clunky.
- Not masking, it takes an extra five minutes and saves ten minutes of cleaning up.
- Rushing the cure, silicone still off-gassing acetate fumes will wrinkle if painted over; acrylic caulk will crack if painted too soon in cool conditions.
The right sealant, applied correctly, should last years with no maintenance. The wrong product, or a poor application, will need re-doing within a season.