Victorian coving, more accurately called a cornice, is one of the most distinctive features of pre-1914 British homes. These ornate plaster mouldings at the wall-ceiling junction can suffer from hairline cracks, broken sections, water damage, or simply decades of paint build-up obscuring the original profile. With the right approach, most damage is repairable to a very high standard.
Minor cracks take an afternoon and a few pounds of materials. Missing or destroyed sections require either professional casting or a careful DIY approach using flexible moulds.
Assessing the Damage
Before starting any repair, tap along the coving with your knuckle. A hollow sound indicates the coving has pulled away from the substrate, the bond between plaster and ceiling or wall has failed. Tapping should produce a solid, slightly dull sound throughout.
| Damage Type | Repair Approach |
|---|---|
| Hairline cracks | Flexible filler or decorator’s caulk |
| Open cracks (>2 mm) | Rake out, undercoat with bonding agent, fill with plaster |
| Small chips to the profile | Plaster filler, shaped by hand or tool |
| Missing section (under 100 mm) | Cast-in-place using fine filler with a profile template |
| Missing section (over 100 mm) | Make or buy a mould; cast replacement section |
| Hollow/de-bonded run | Re-fix with screws and plugs; re-point/fill fixings |
| Water-damaged, crumbling | Strip and replace; identify and fix water source first |
Tools and Materials
- Flexible decorator’s caulk and caulk gun
- Fine-surface filler (e.g., Toupret or Polyfilla Fine Surface)
- One-coat plaster or bonding plaster
- Small plasterer’s leaf and gauging trowel
- Profile gauges or home-made card templates
- Mist coat spray bottle
- Flexible moulding rubber (for casting new sections)
- Casting plaster (dental plaster or Beta plaster is finer than general DIY plaster)
- Sandpaper (120–240 grit)
- Dust sheets, safety glasses
Repairing Hairline Cracks
Victorian coving is old plaster, it has been moving with the building for over a century. Rigid filler in hairline cracks tends to re-crack within months. Use:
- Clean out loose dust from the crack with a brush.
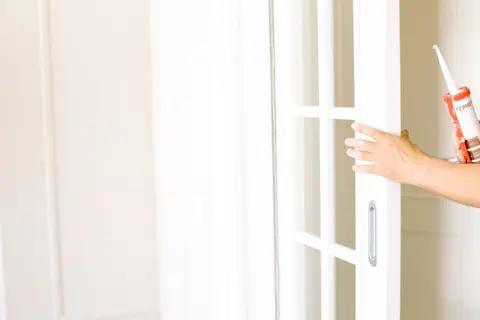
- Apply flexible decorator’s caulk (an acrylic or latex-based product, not silicone) and smooth with a damp finger.
- Allow to dry fully before painting, typically 2–4 hours.
This remains flexible through minor building movement. For slightly larger cracks, fill in two stages: undercoat with slightly diluted filler, allow to dry, sand flush, and finish with fine surface filler.
Patching Small Missing Sections
For chips and small losses, the goal is to rebuild the correct profile in filler or plaster.
- Cut a profile template from thick card by pressing it against an undamaged section of the coving to trace the exact moulding shape.
- Dampen the area to be filled with clean water (misting is best, too much water weakens the bond).
- Apply fine surface filler in layers no more than 5 mm deep, allowing each layer to set.
- While the final layer is wet, draw the card template along the coving to replicate the moulding shape.
- Smooth with a damp brush, allow to harden fully, then sand carefully with fine paper.
Multiple thin layers are far better than one thick application, thick plaster slumps before it can be shaped.
Replacing a Missing Run with a Cast Section
For losses of more than 100–150 mm, casting a replacement section is the most reliable method.
Step 1: Make the Mould
Find an undamaged section of the same coving profile (or a neighbour’s if the coving has been removed entirely). Clean and apply release agent (petroleum jelly or mould release spray). Apply flexible moulding rubber in layers, following the manufacturer’s instructions, allow each layer to gel before the next.
Allow the rubber to cure fully (typically 24–48 hours) before peeling away. You now have a flexible mould of the exact profile.
Step 2: Cast the Replacement
Mix Beta plaster (finer and stronger than Plaster of Paris) to a thick cream consistency. Pour into the mould, tapping to release air bubbles. Add scrim (fibrous mesh) for sections over 200 mm long. Allow to set (typically 20–40 minutes) and demould carefully.
Step 3: Fix in Place
- Cut the cast to length with a small hacksaw.
- Dry-fit first to check the alignment and profile match.
- Apply bonding adhesive (grab adhesive or PVA-mixed plaster) to the back of the cast and the substrate.
- Press firmly into position and support until set, temporary props from below using offcuts of timber work well.
- Fill the joints at each end with fine plaster, feathering into the existing coving.
Re-Fixing De-Bonded Coving
If large sections have pulled away from the ceiling or wall:
- Use a small drill to create pilot holes through the coving face at 45°, angled to fix into the solid substrate behind.
- Drive brass or stainless steel screws (not steel, which will rust and stain) until the coving is pulled back into position.
- Fill the screw heads with fine filler in two coats.
- Fill any gaps at the coving-ceiling and coving-wall junctions with caulk.
Never try to re-bond large sections with adhesive alone, the weight of Victorian lime plaster coving is considerable and adhesive is not reliable as the sole fixing.
Professional Restoration Costs
| Service | Typical 2026 Cost |
|---|---|
| Small crack or chip repair (per visit) | £80–£150 |
| Repair/re-fix per linear metre | £80–£200 |
| Cast and install replacement section (per metre) | £150–£350 |
| Full room cornice restoration | £500–£2,500+ |
| Specialist conservation plasterer | £250–£400/day |
Specialist conservation plasterers, those trained in traditional lime and ornamental plasterwork, are increasingly in demand and can be found through the Plasterers’ Federation or through the Institute of Historic Building Conservation (IHBC) referral network.
Paint Buildup
Decades of emulsion paint obscure the detail in Victorian cornices. Chemical paint stripper (Peelaway is widely used for heritage work) or steam stripping reveals the original profile. Both methods require care, excessive water can soften the plaster and damage fine detail. Work in small sections and allow thorough drying between stages.
Once stripped, apply a mist coat of diluted PVA before painting to seal the bare plaster and prevent paint absorption causing an uneven finish.
Should You Match Lime or Use Modern Plaster?
For listed buildings or conservation areas, using lime-compatible materials is generally recommended and may be required by planning conditions. Lime plaster is more flexible than modern gypsum plaster and is more sympathetic to the movement in old buildings.
For unlisted Victorian properties, modern finishing plasters and fillers are acceptable and significantly easier to work with. The key is matching the profile accurately, the material is secondary to the visual result in most domestic contexts.